
Scandinavian Fabric Stars

My new DIY holiday gift obssession…
This year, I wanted to get a head start on my DIY Christmas gifts. I ALWAYS wait till the last minute and oftentimes end up just purchasing last-minute gifts. So as the holidays approach and family gatherings begin, I wanted to be prepared to hand out my handmade gifts. The Scandinavian fabric starts are a perfect small gift for loved ones.
This is a no-sew project, and it’s a lovely way to spend a few hours creating. Here is what you will need to make your own.
Tips for a beautiful finished product
Take your time! This isn’t a ‘quick’ project per se; After making a few and getting into a flow, each star took me about 20 minutes to make. From cutting fabric to the finished product. Take your time and enjoy the process; your patience will pay off.
Press EVERYTHING. Pressing as you go will give you crisp finishes. Every time you fold the fabric, press the fold. It will make a world of difference.
Use a Tailor’s Clapper. I started using a clapper in the past year, and let me tell you, it has improved my end product SO MUCH. A tailor’s clapper is a block of wood that is used to get flat, crisp seams. Don’t sleep on using a clapper. Learn more here!
Use Startch when pressing your fabric before cutting. This is also new to me. I started pressing with spray before cutting fabric for quilting and realized it makes a world of difference when quilting and is great for this project.
SUPPLIES
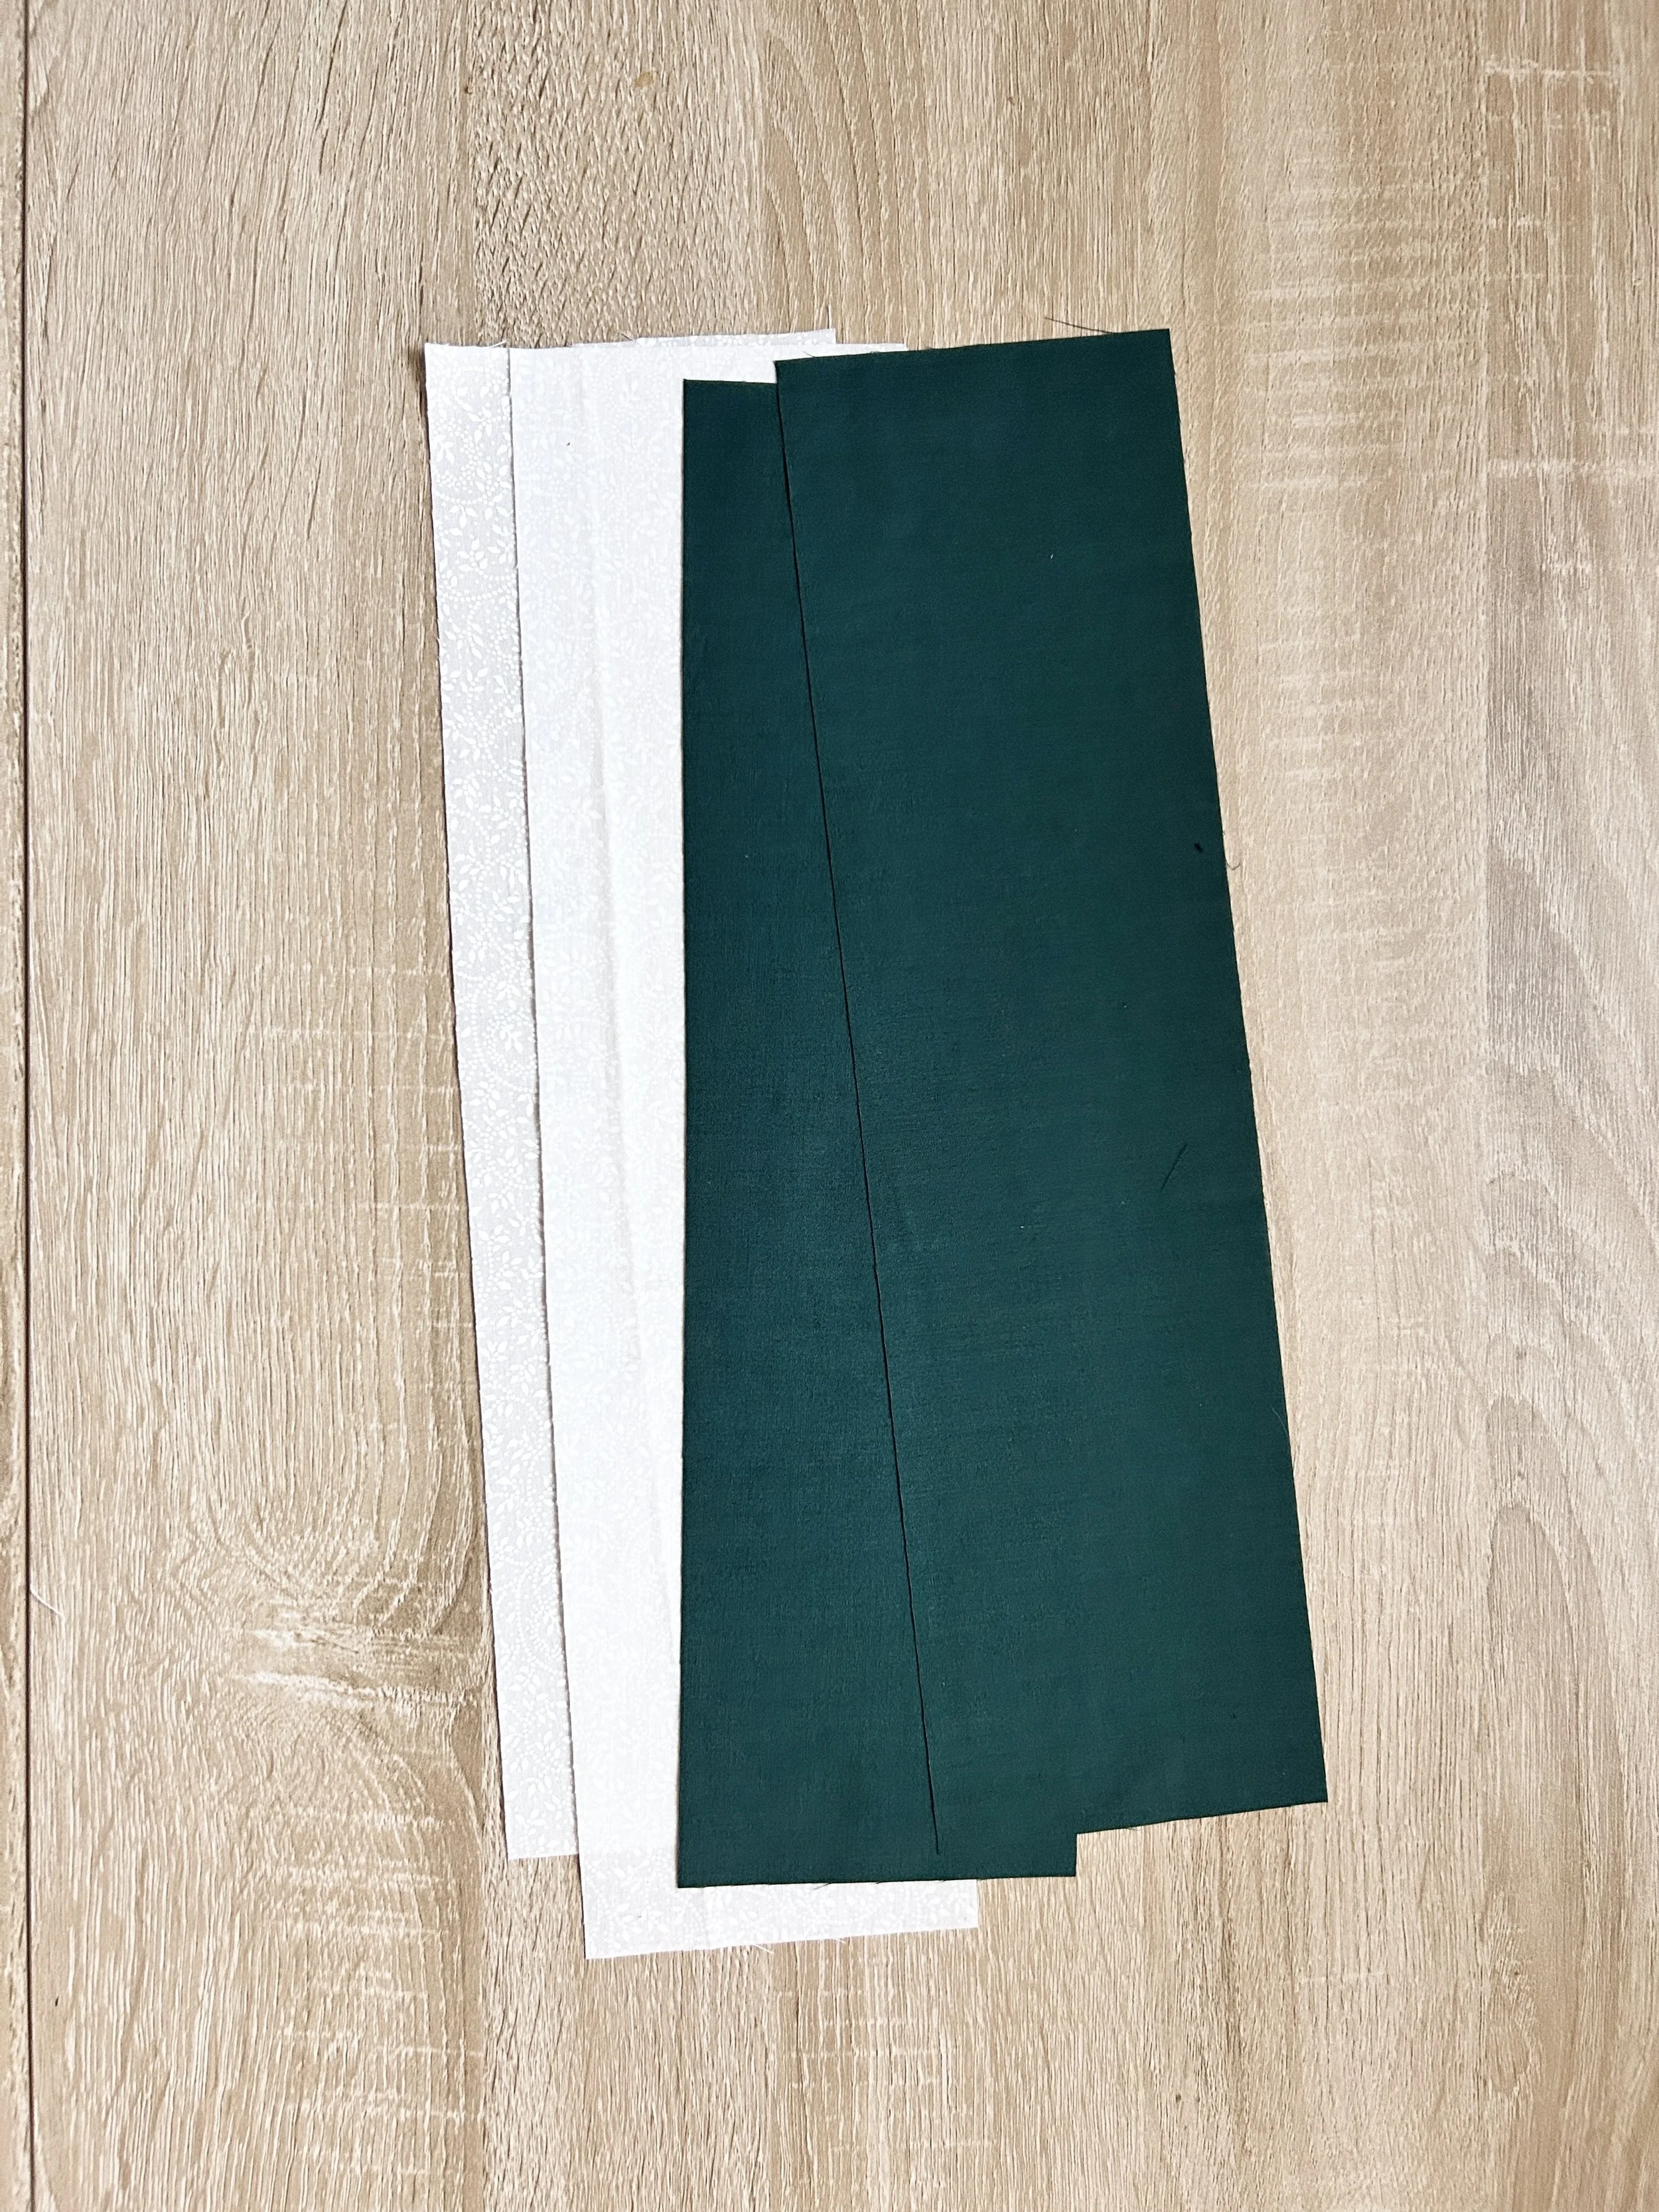
Fabric - each star uses 4 strips of fabric, each strip is 15’’ x 4’’. (one fat quarter will make one star)
Iron
Scissors
OPTIONAL SUPPLIES, but makes a big difference!
Clapper
Spray fabric starch
Point-turner or sewing tweezers (to help thread strips through one another)
STEPS. >>> link to the video tutorial
1.
CUT 4 strips of fabric 15’’ x 4’’; You can use alternating colors of make them all the same
2.
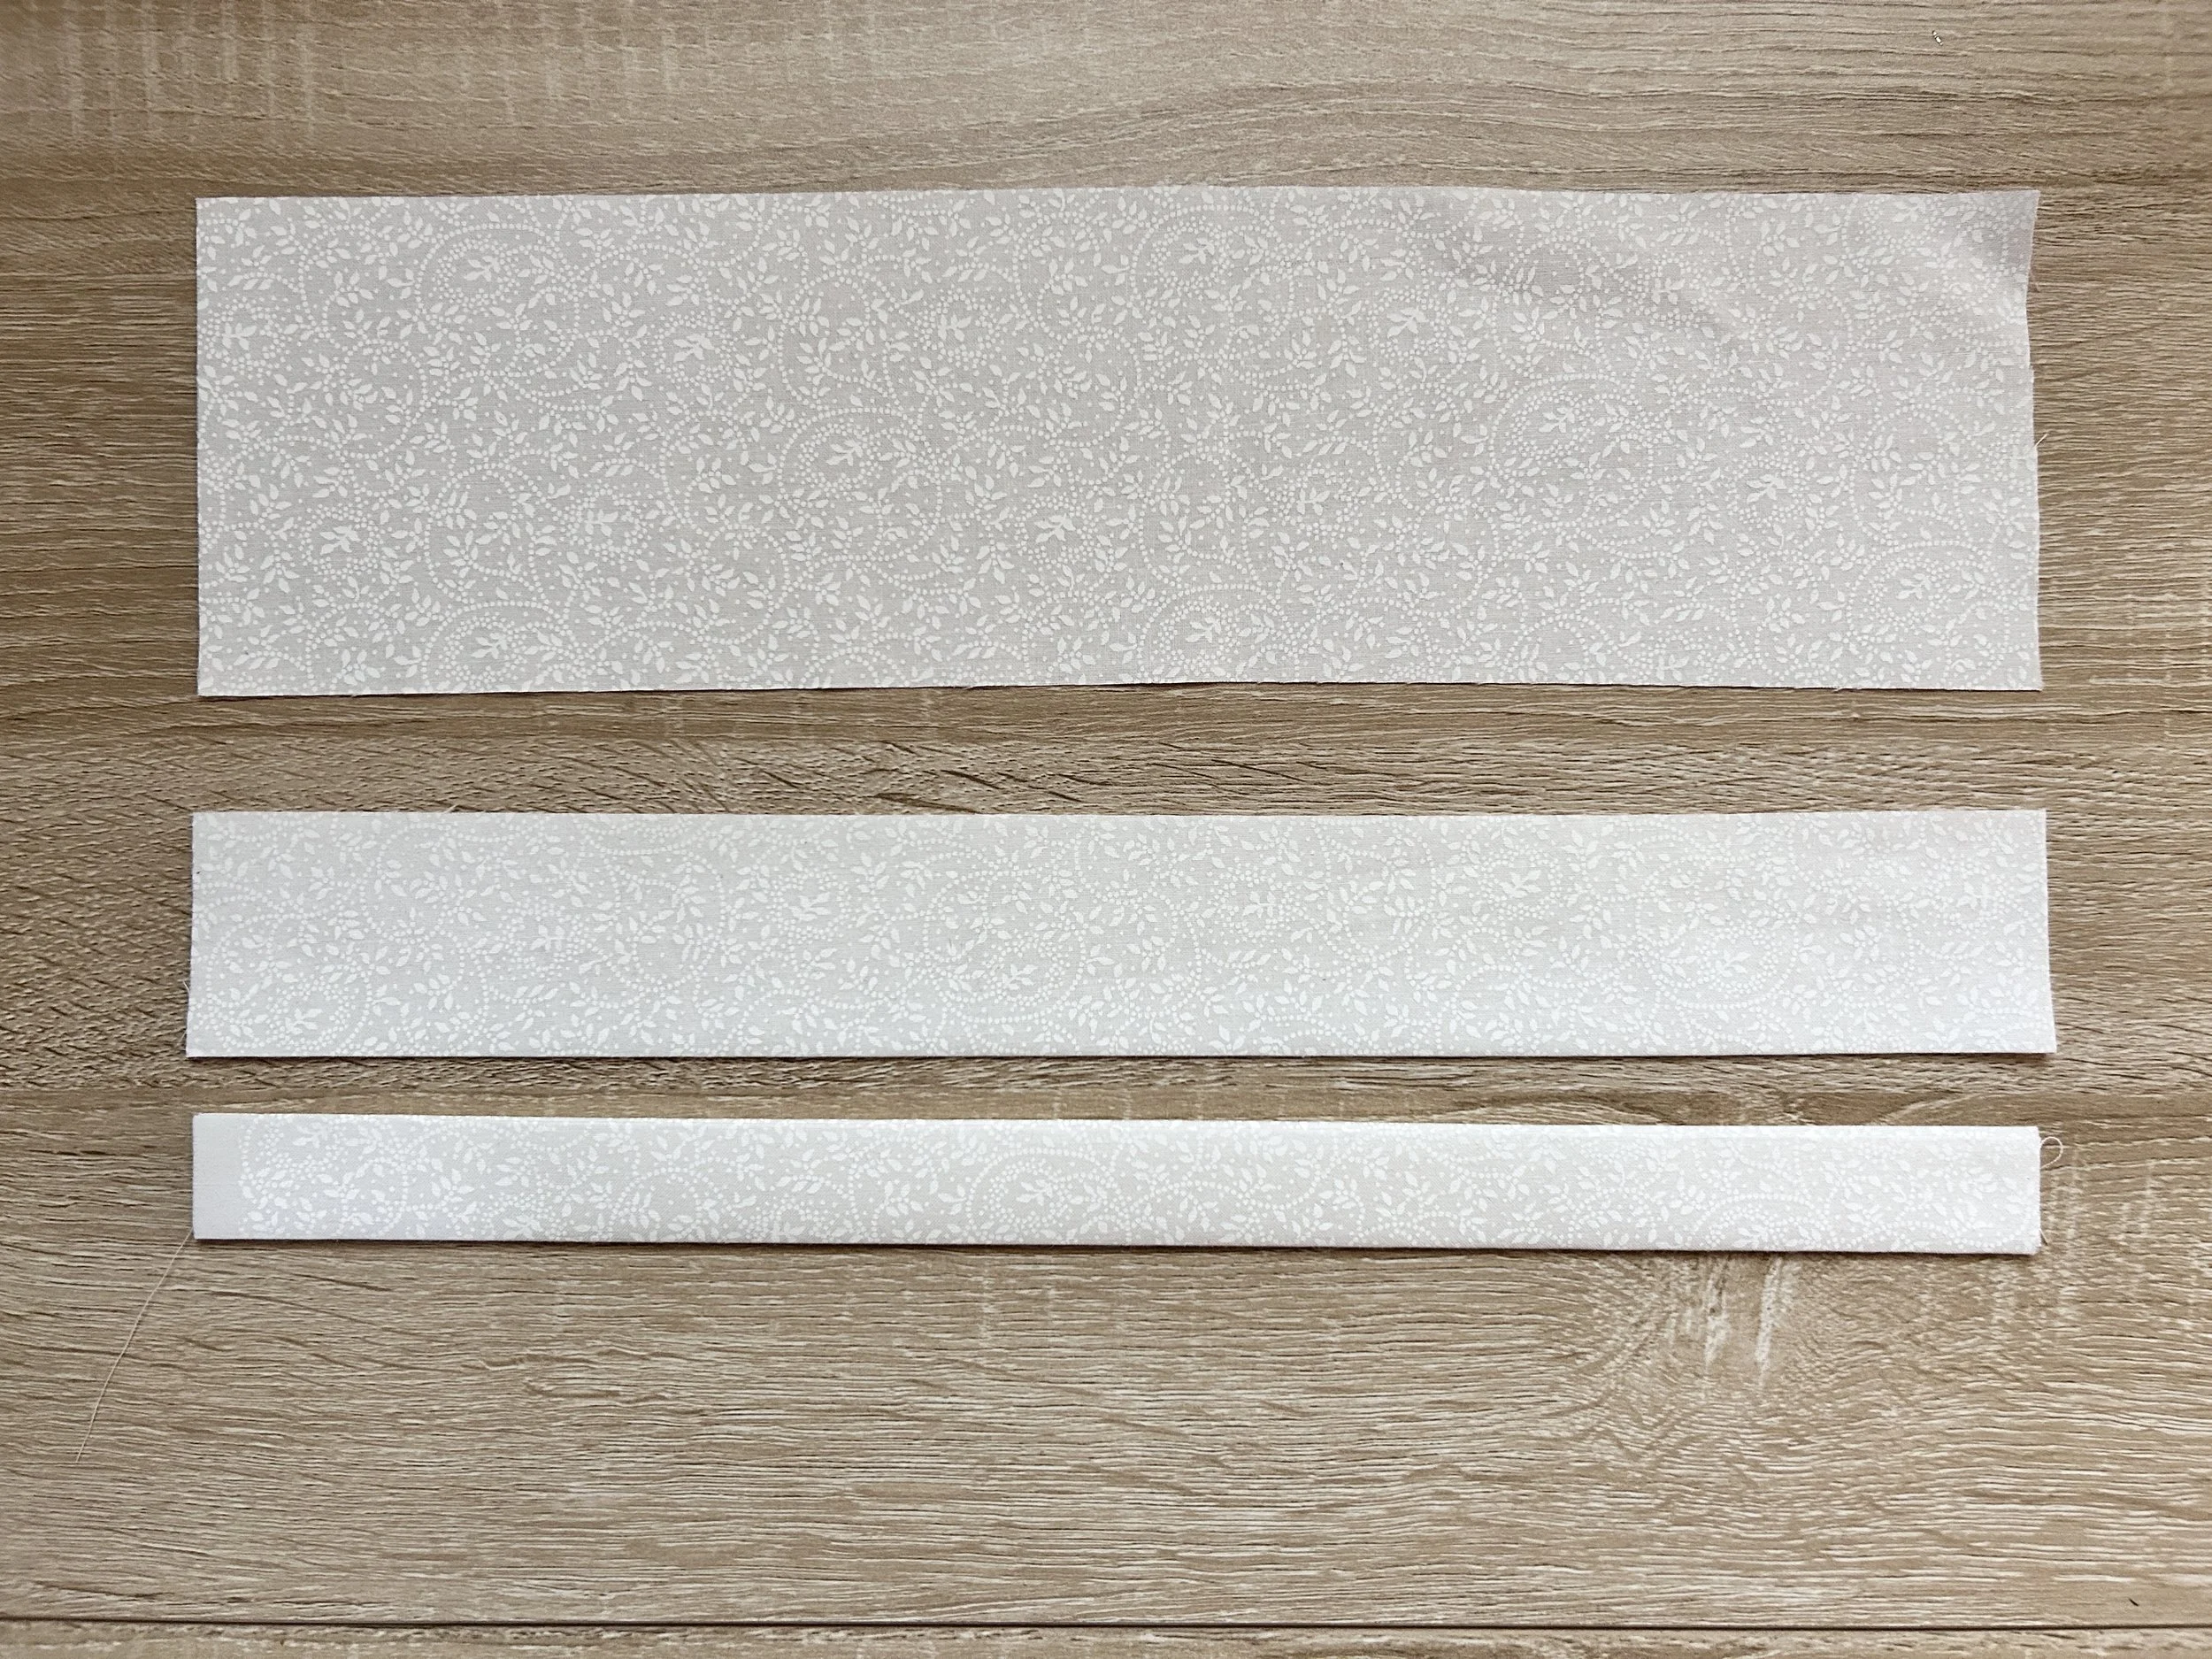
Fold each strip in half and press, then fold each edge to the middle line and press so that the fabric is now double-folded.
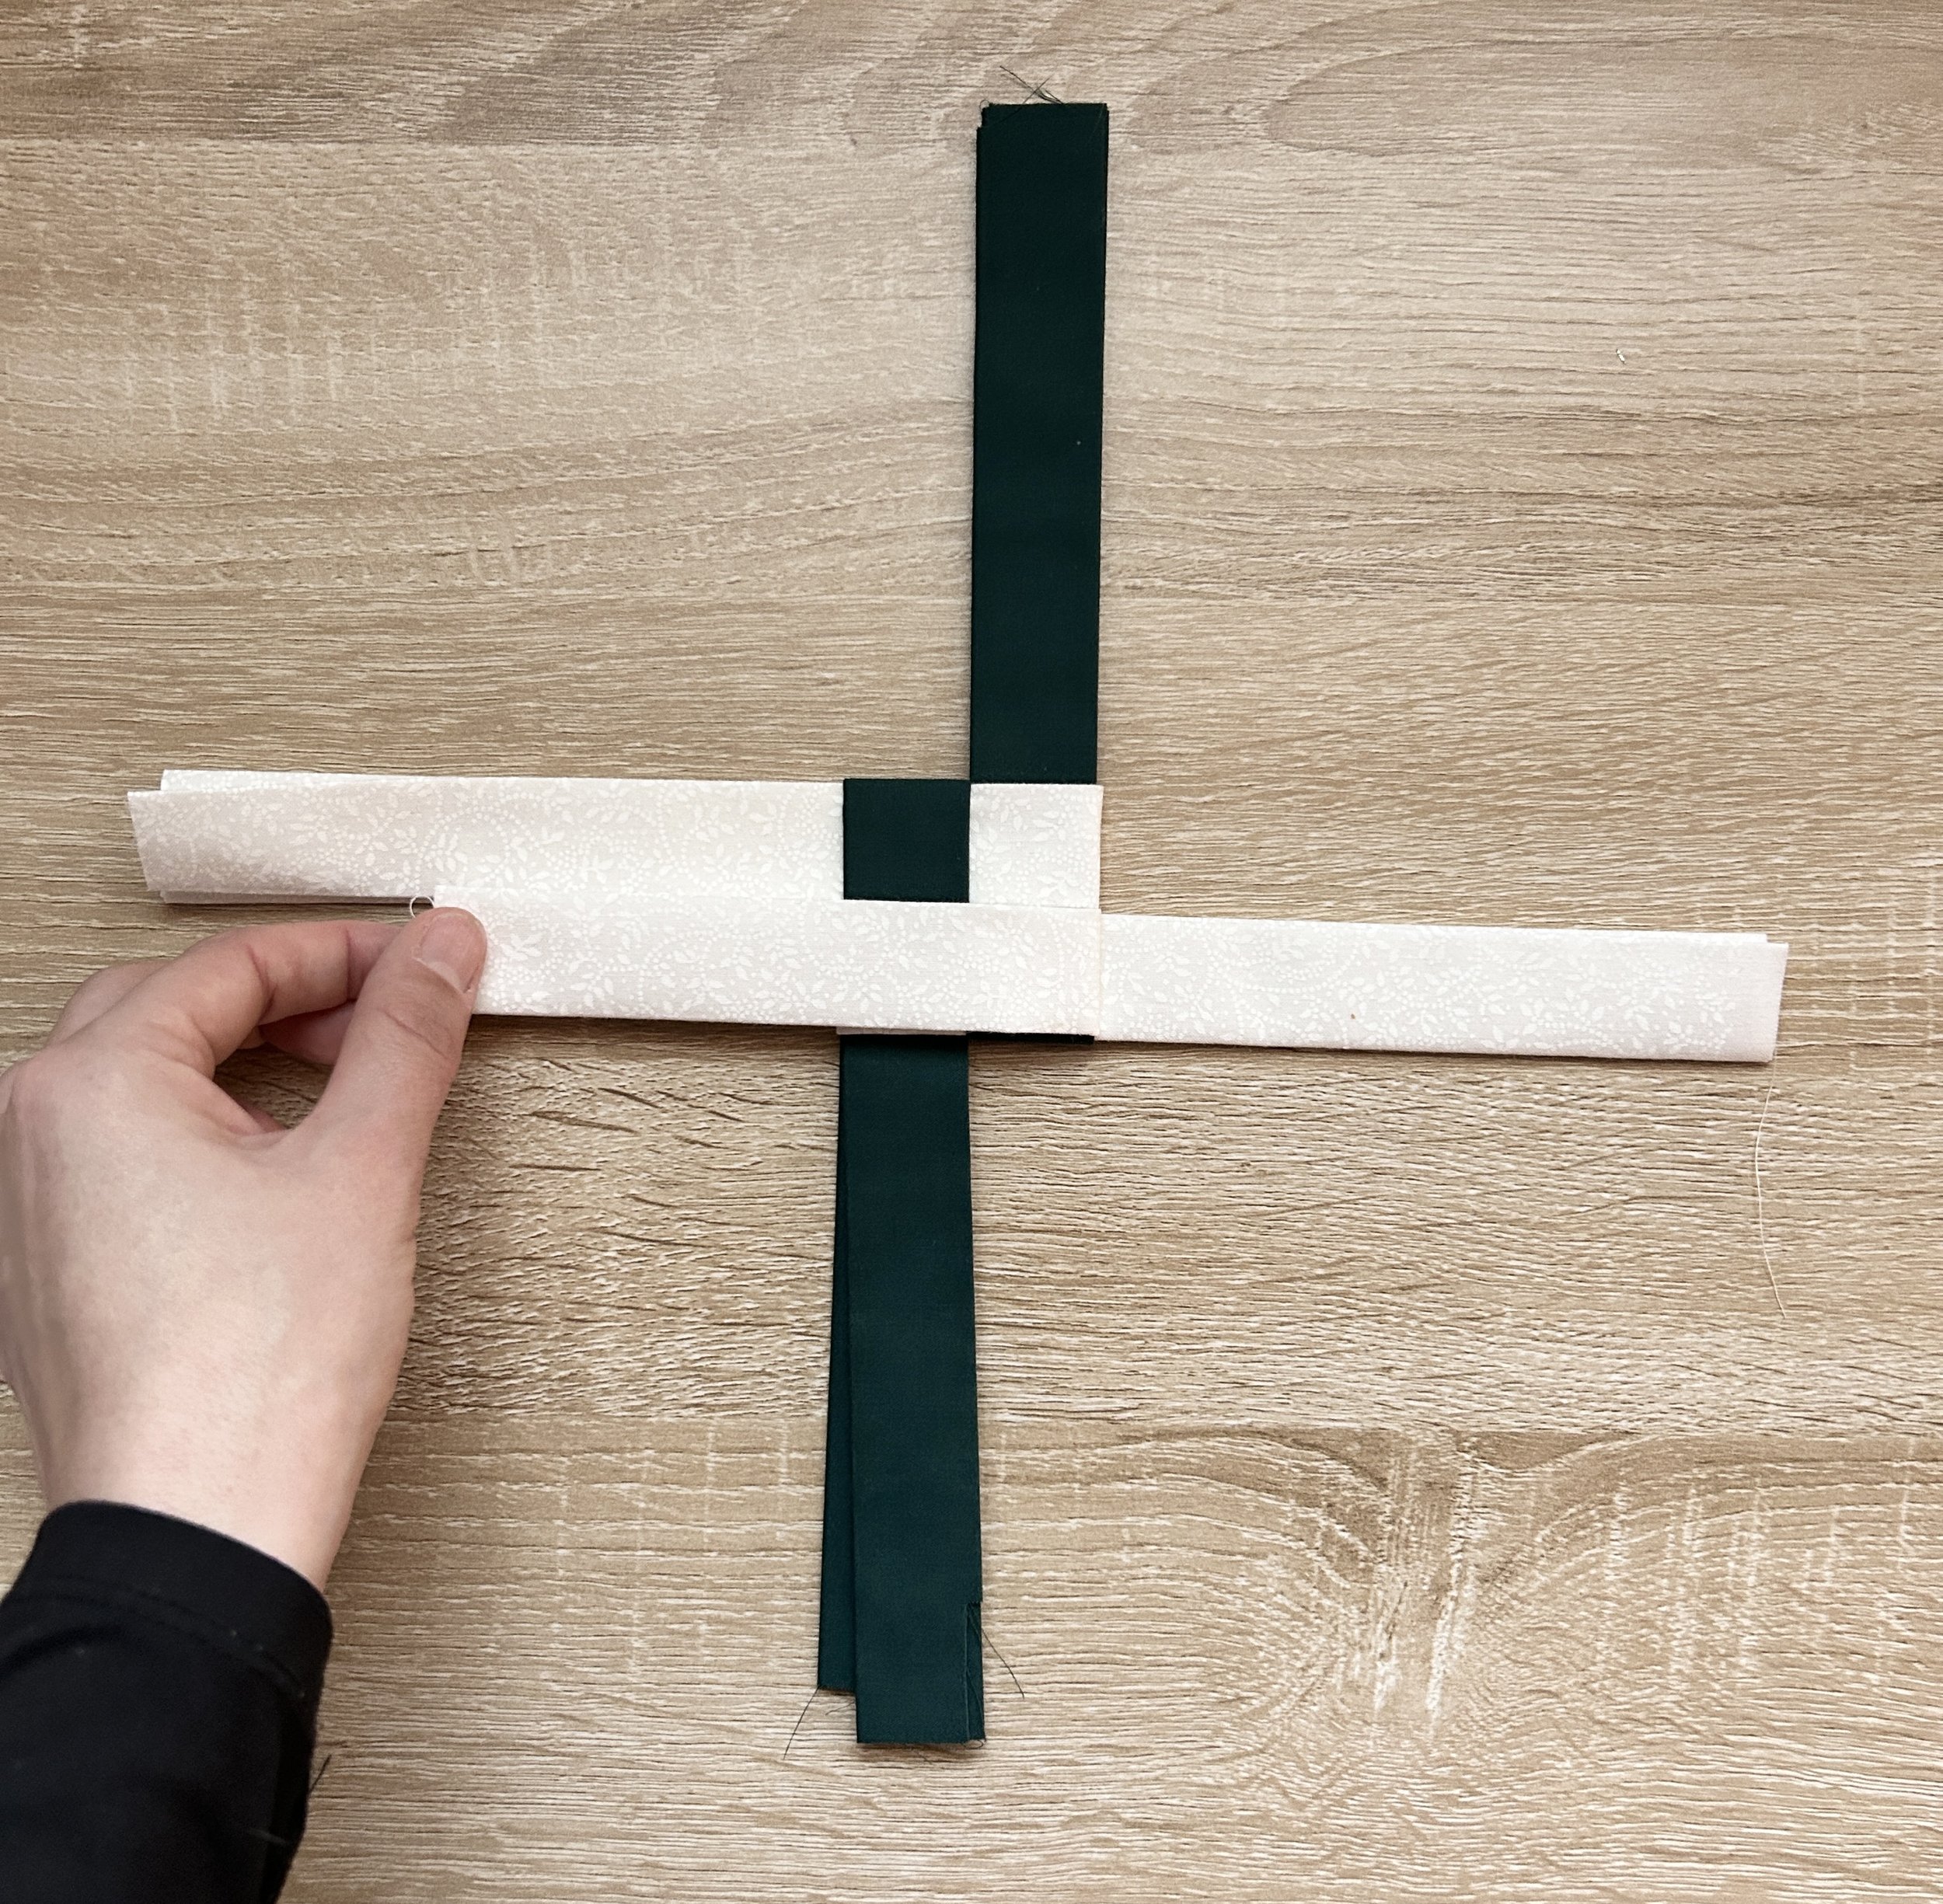
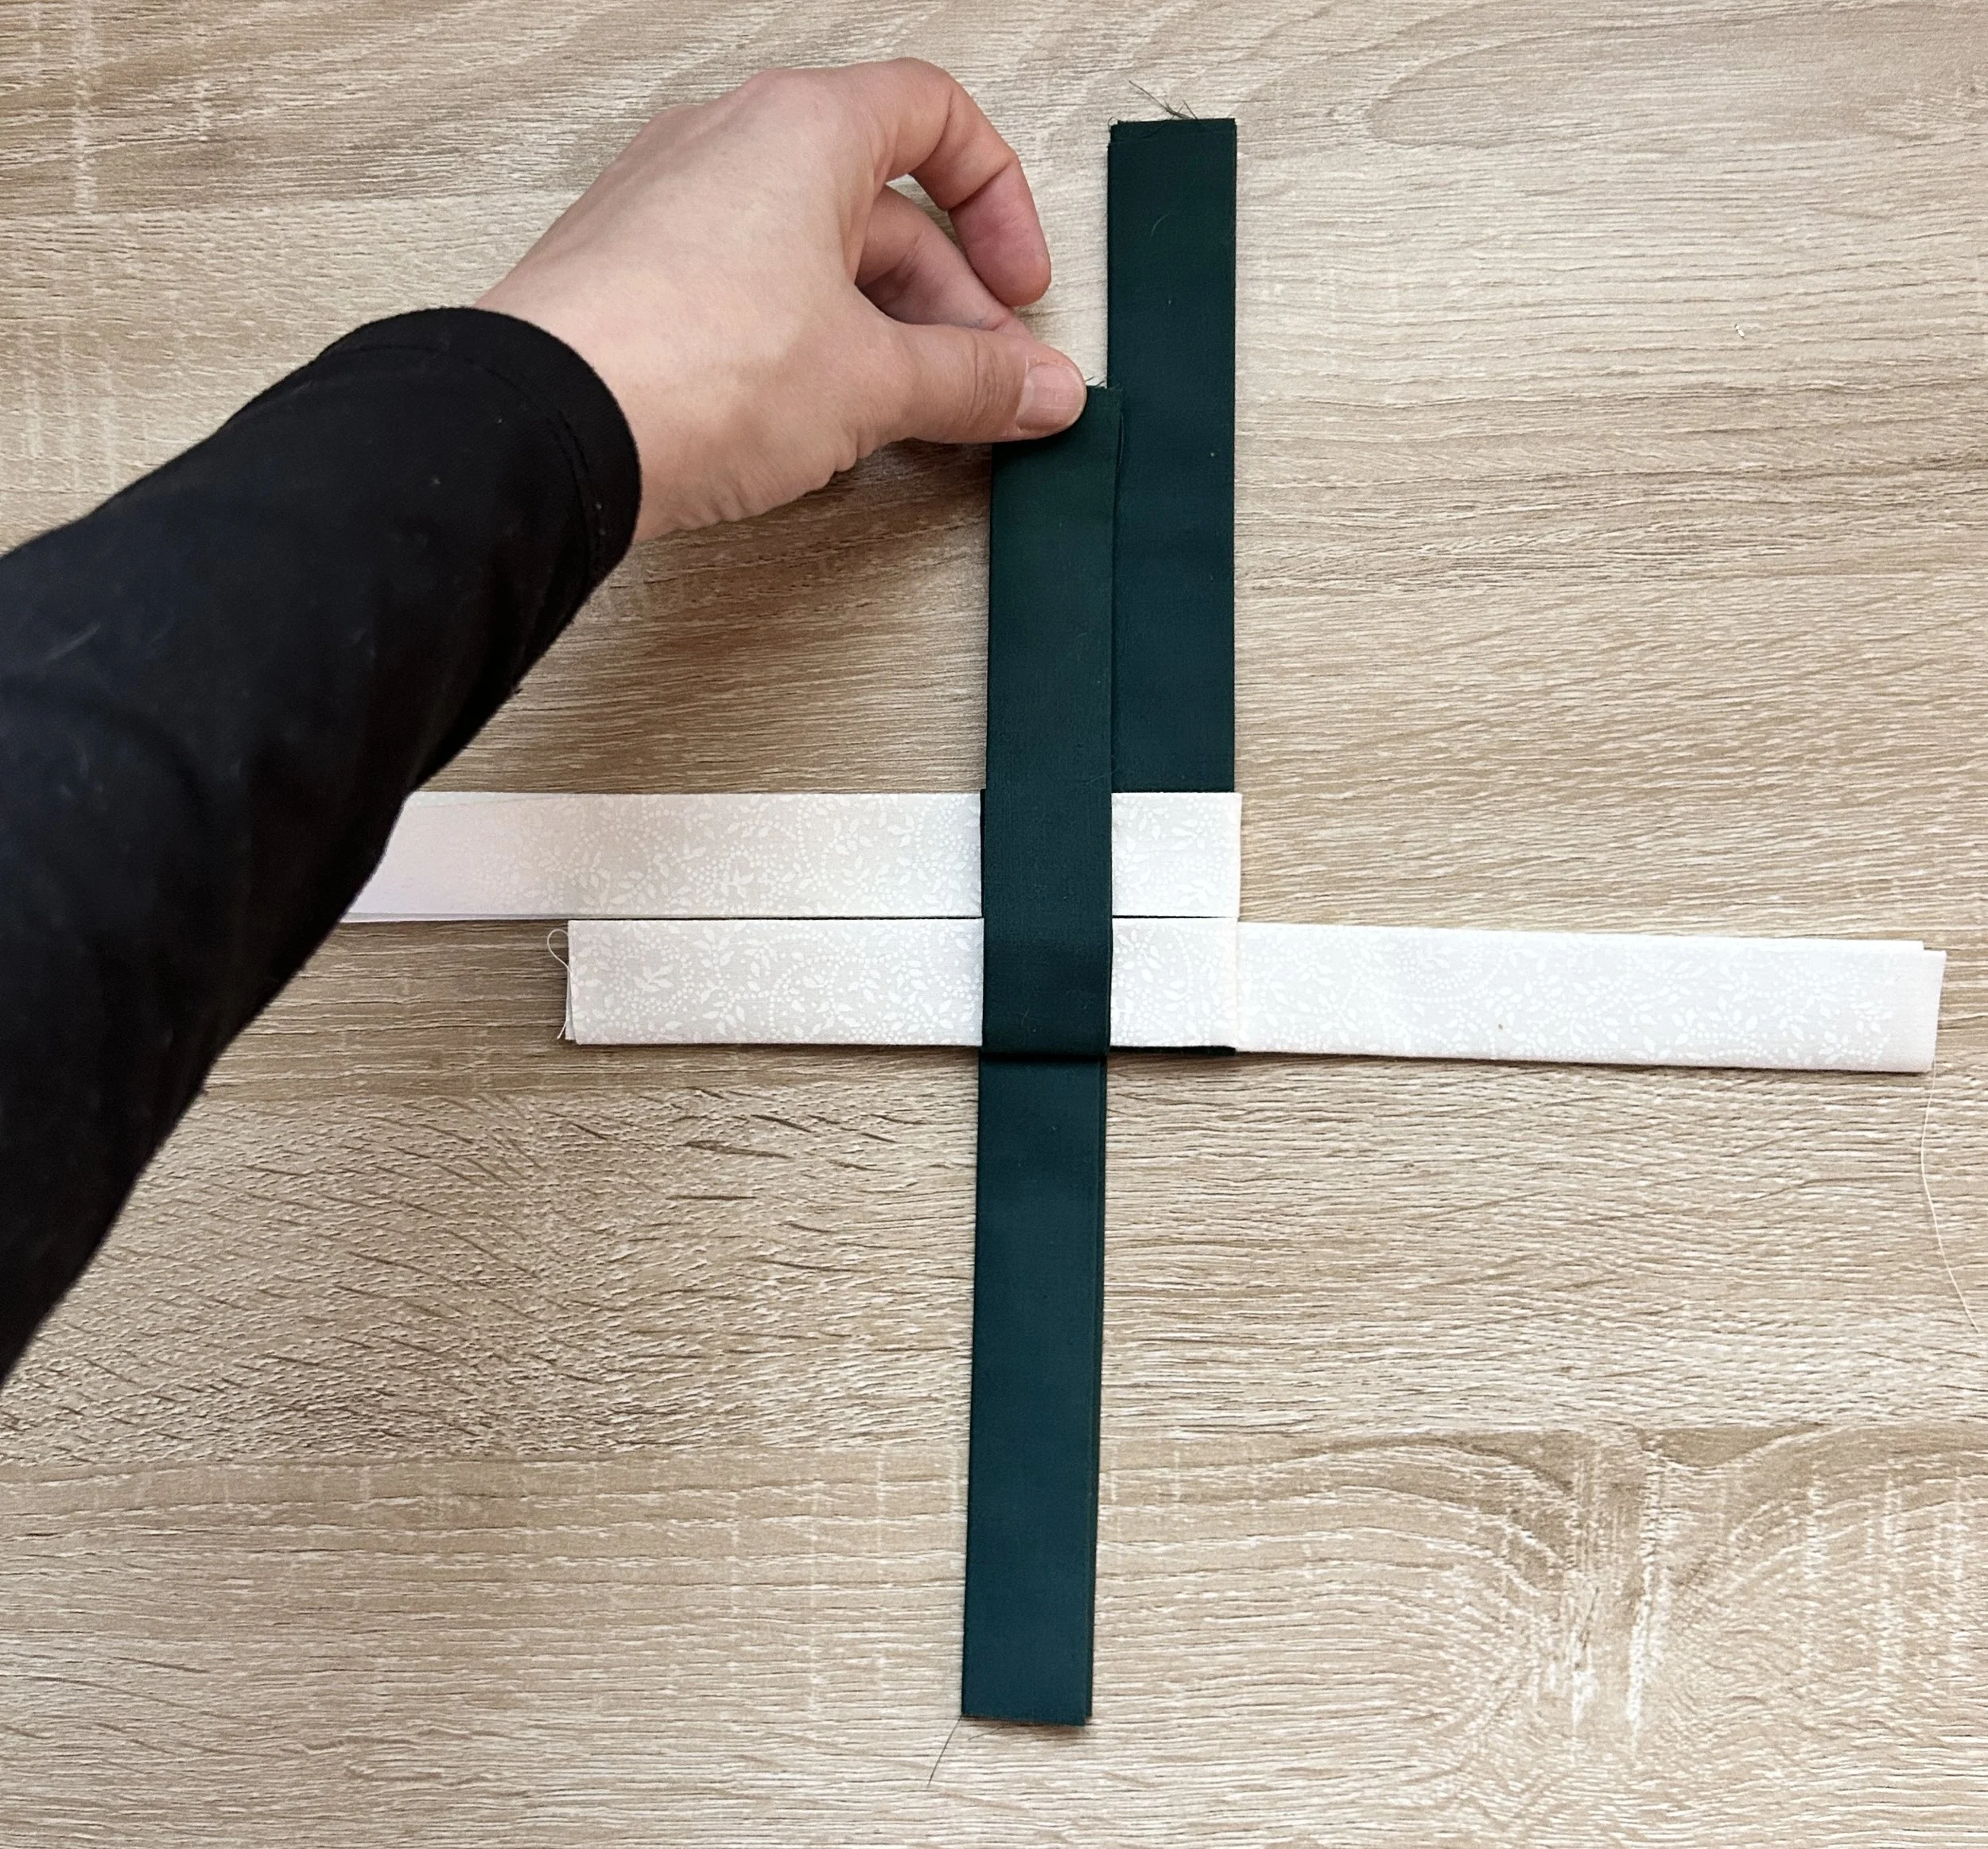
3.
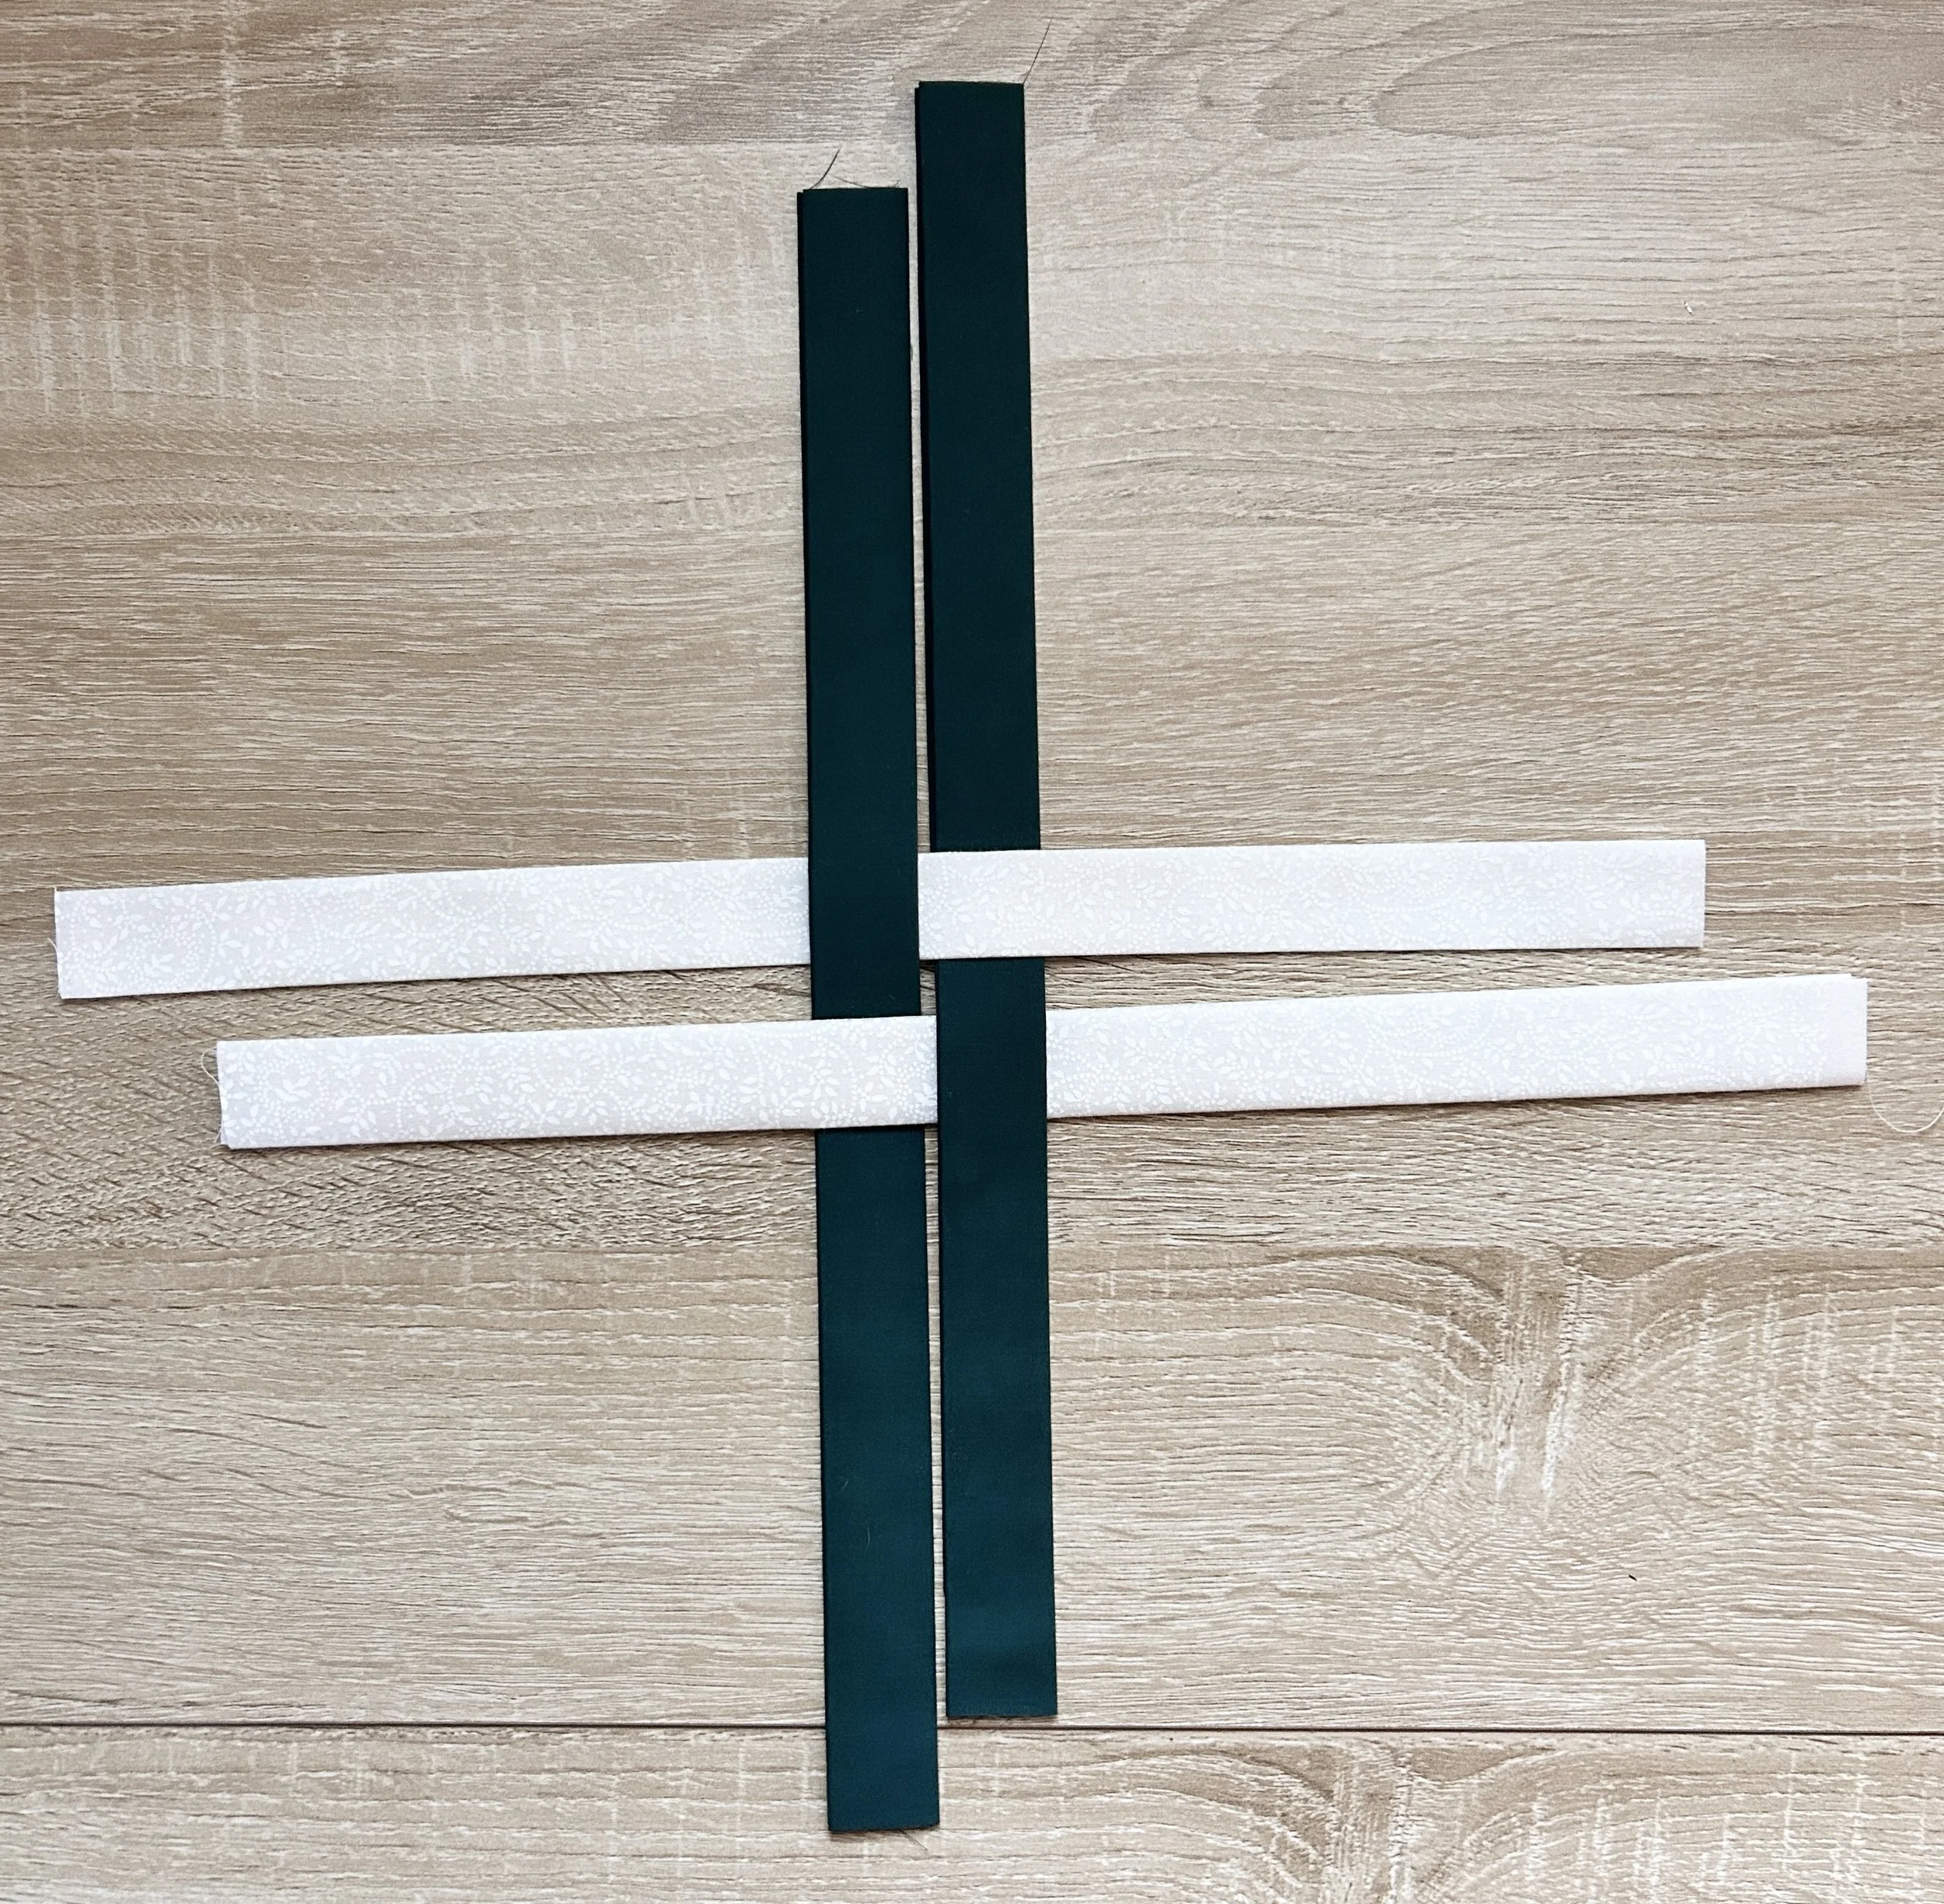
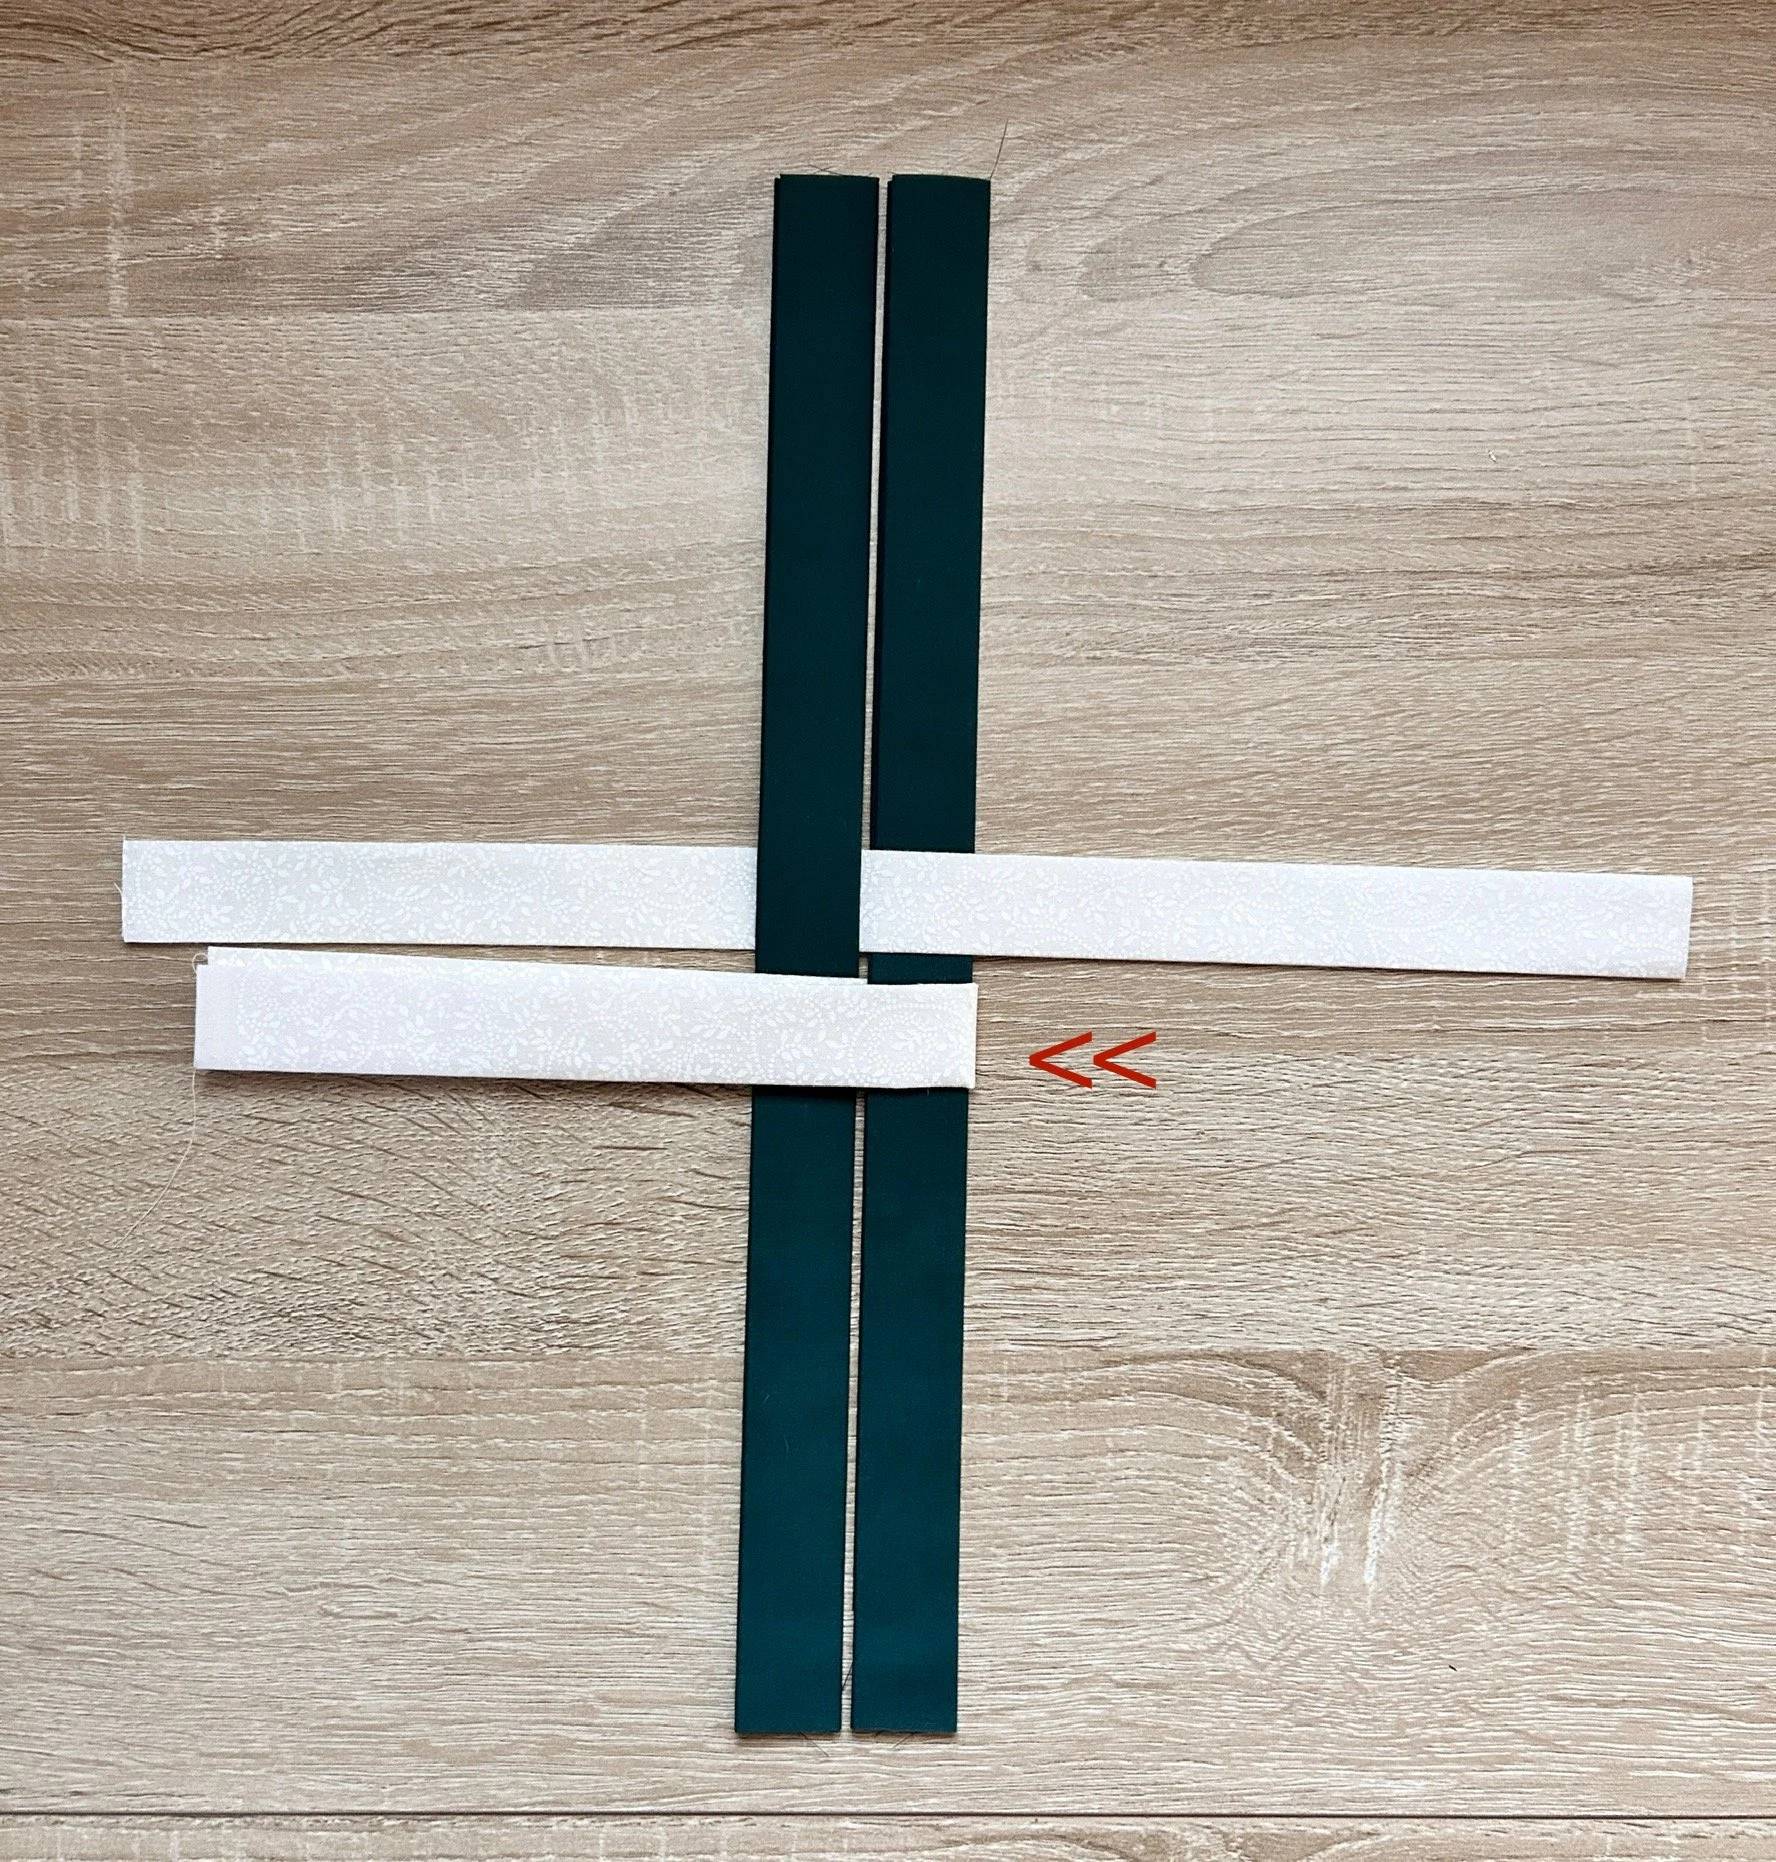
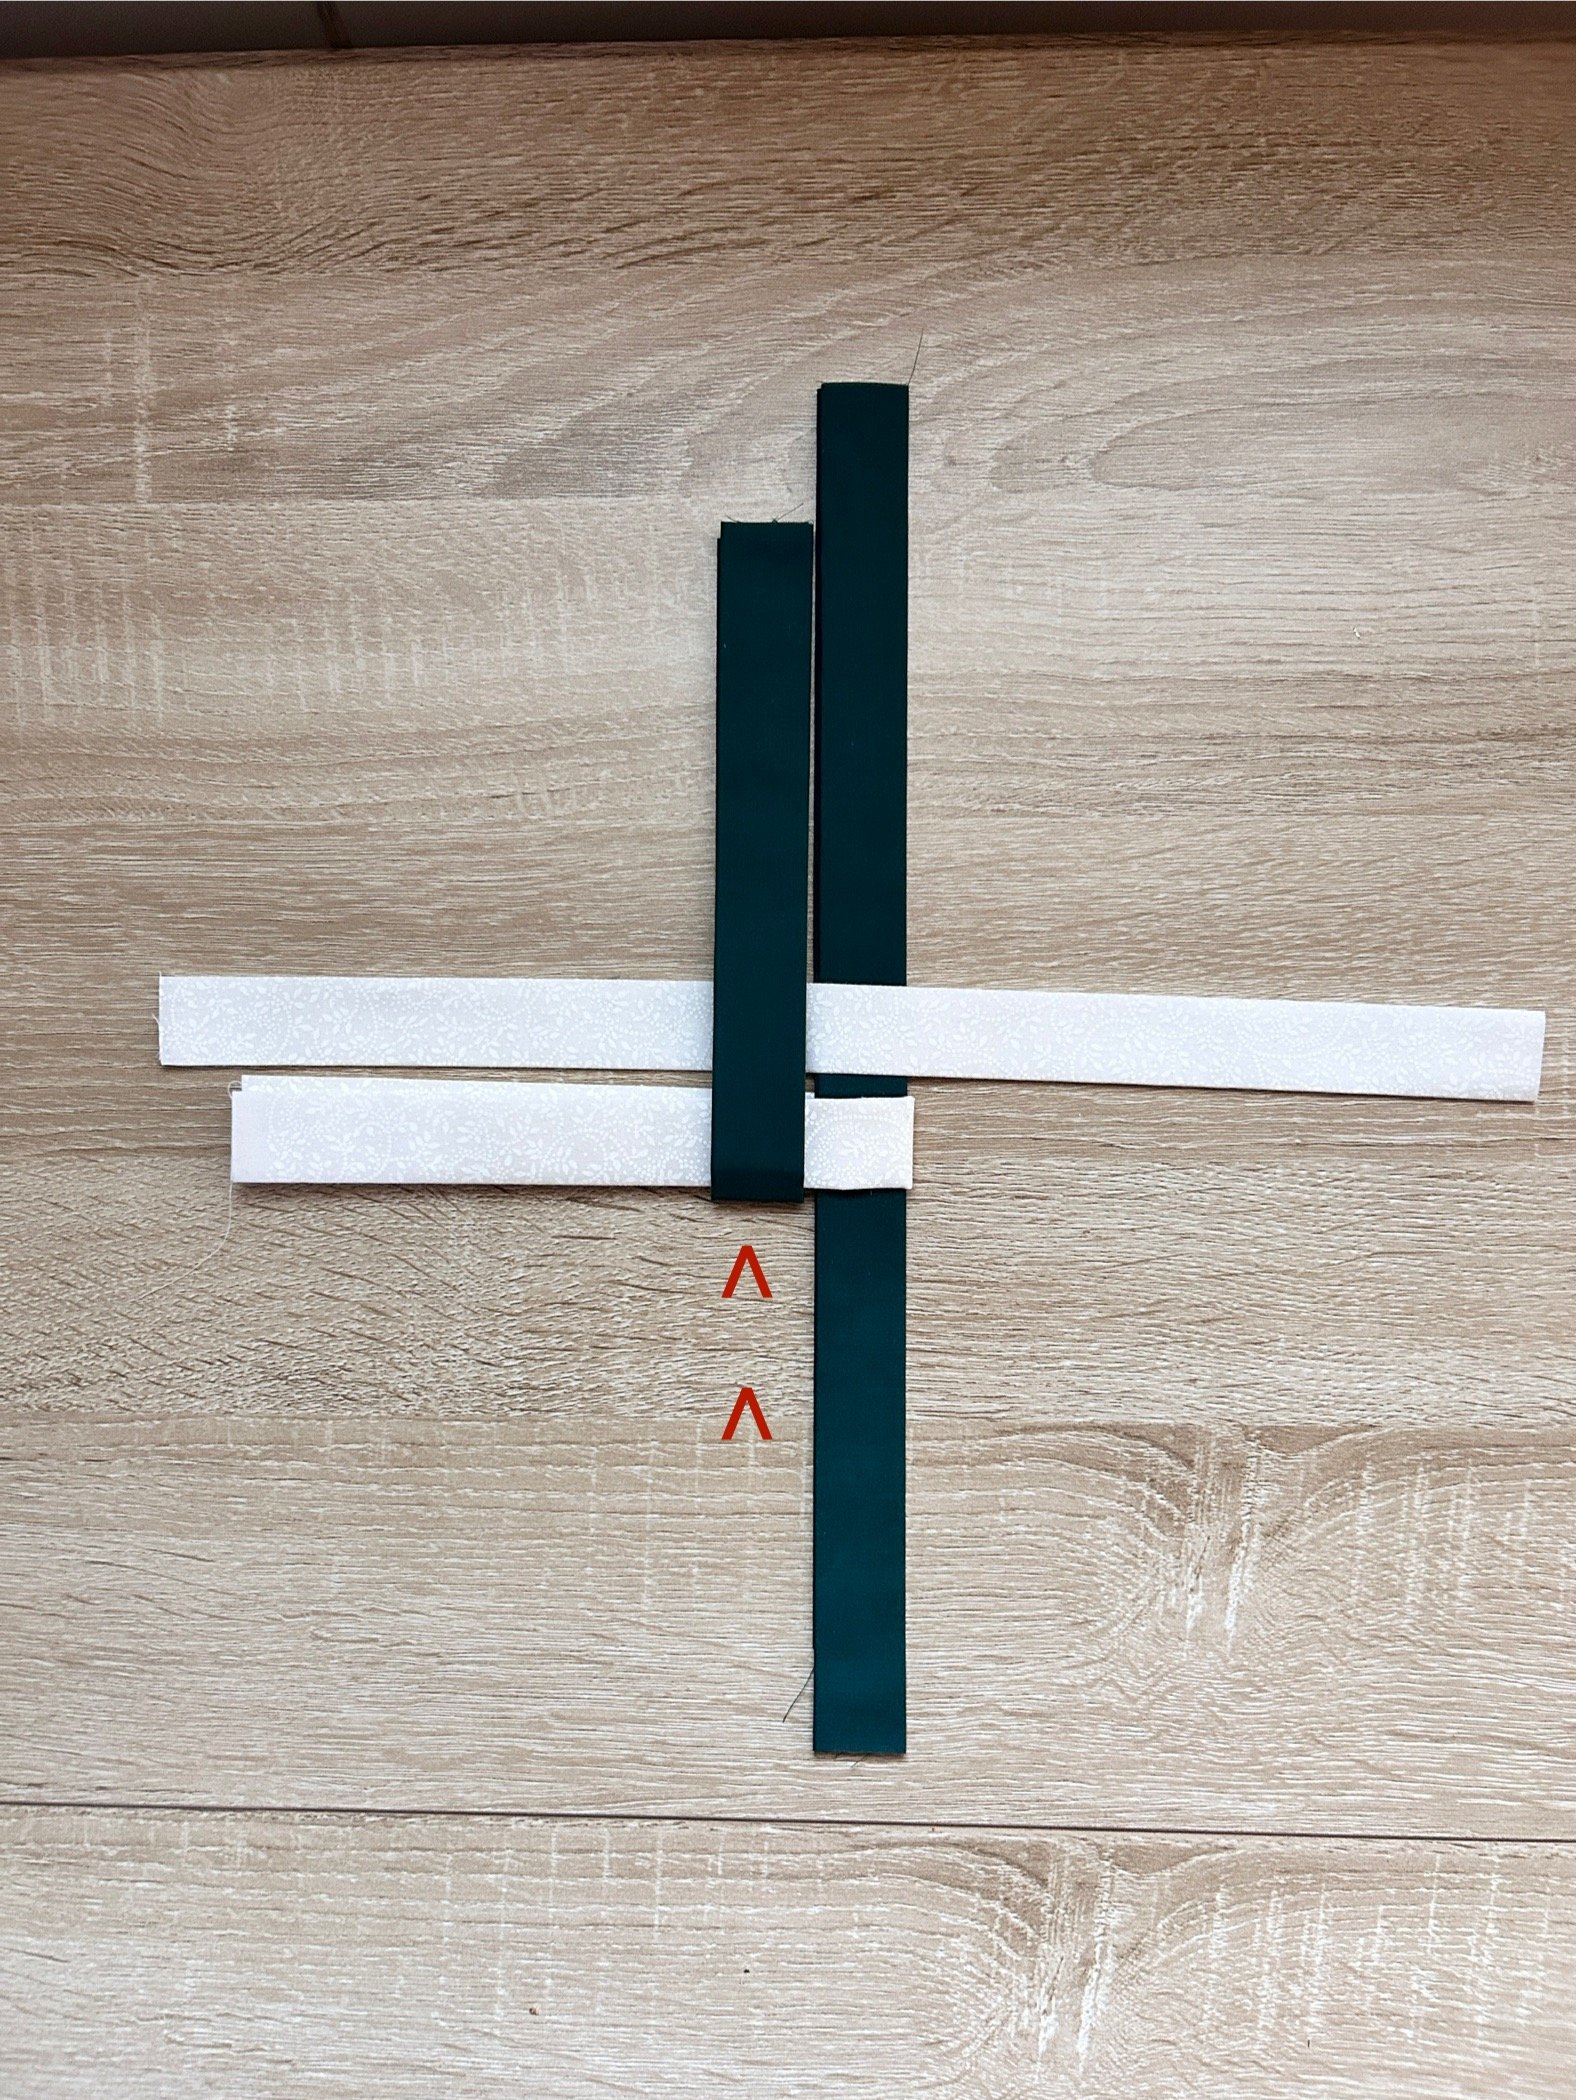
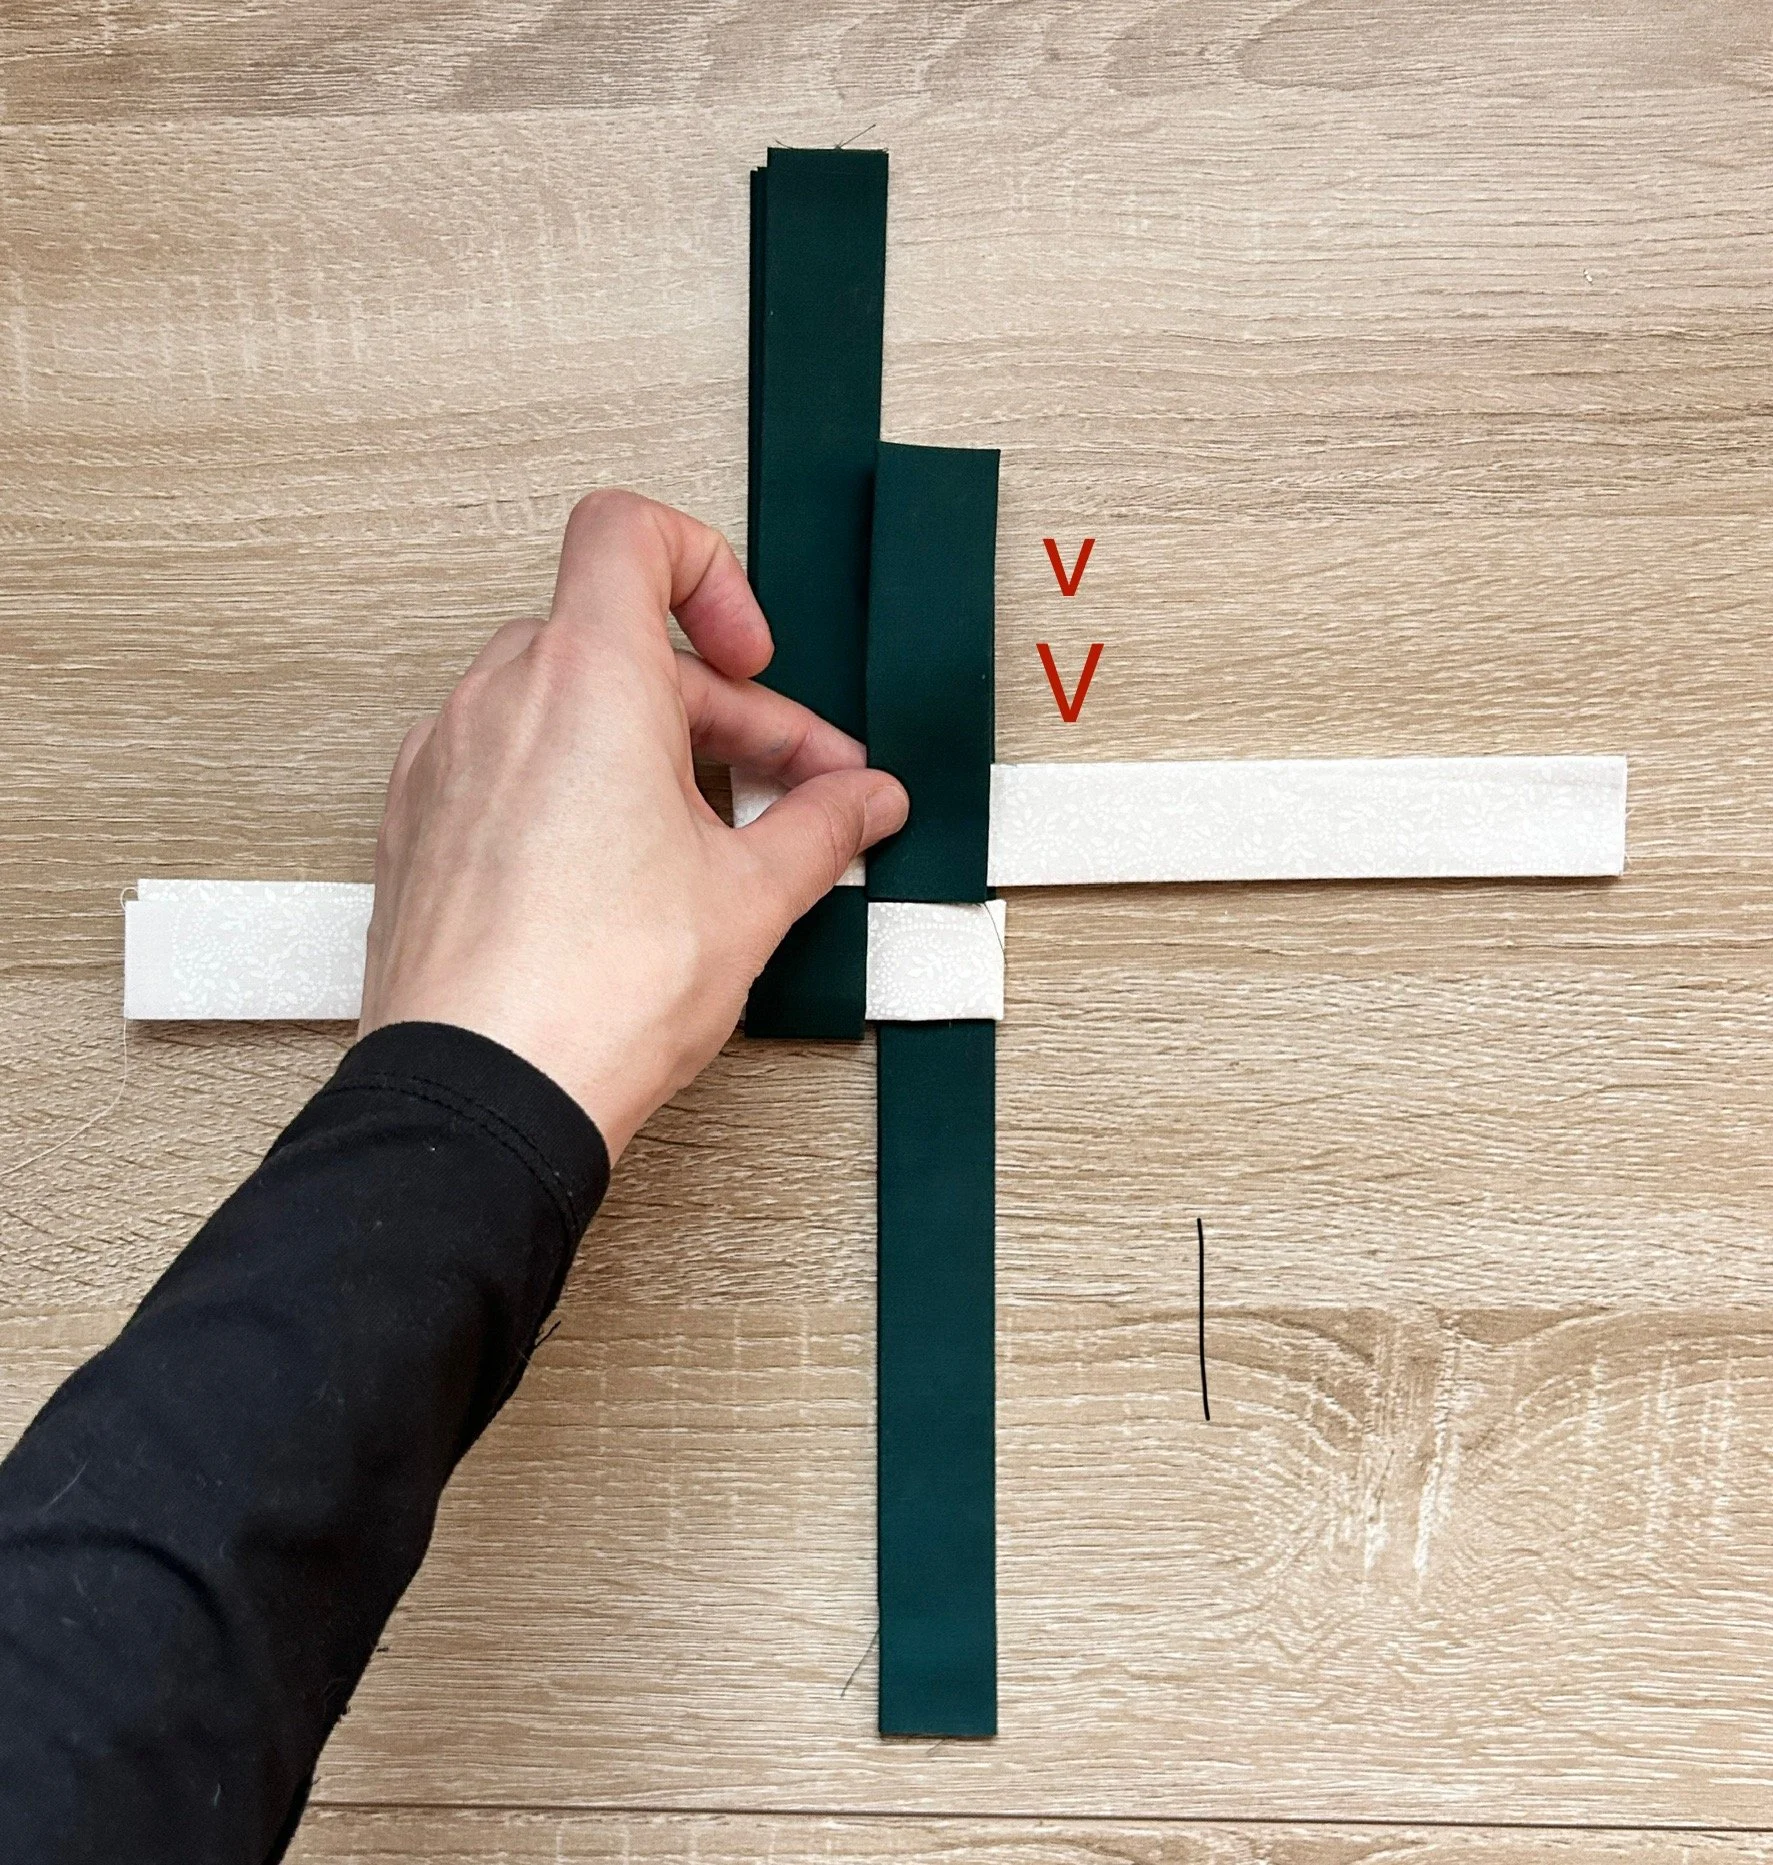
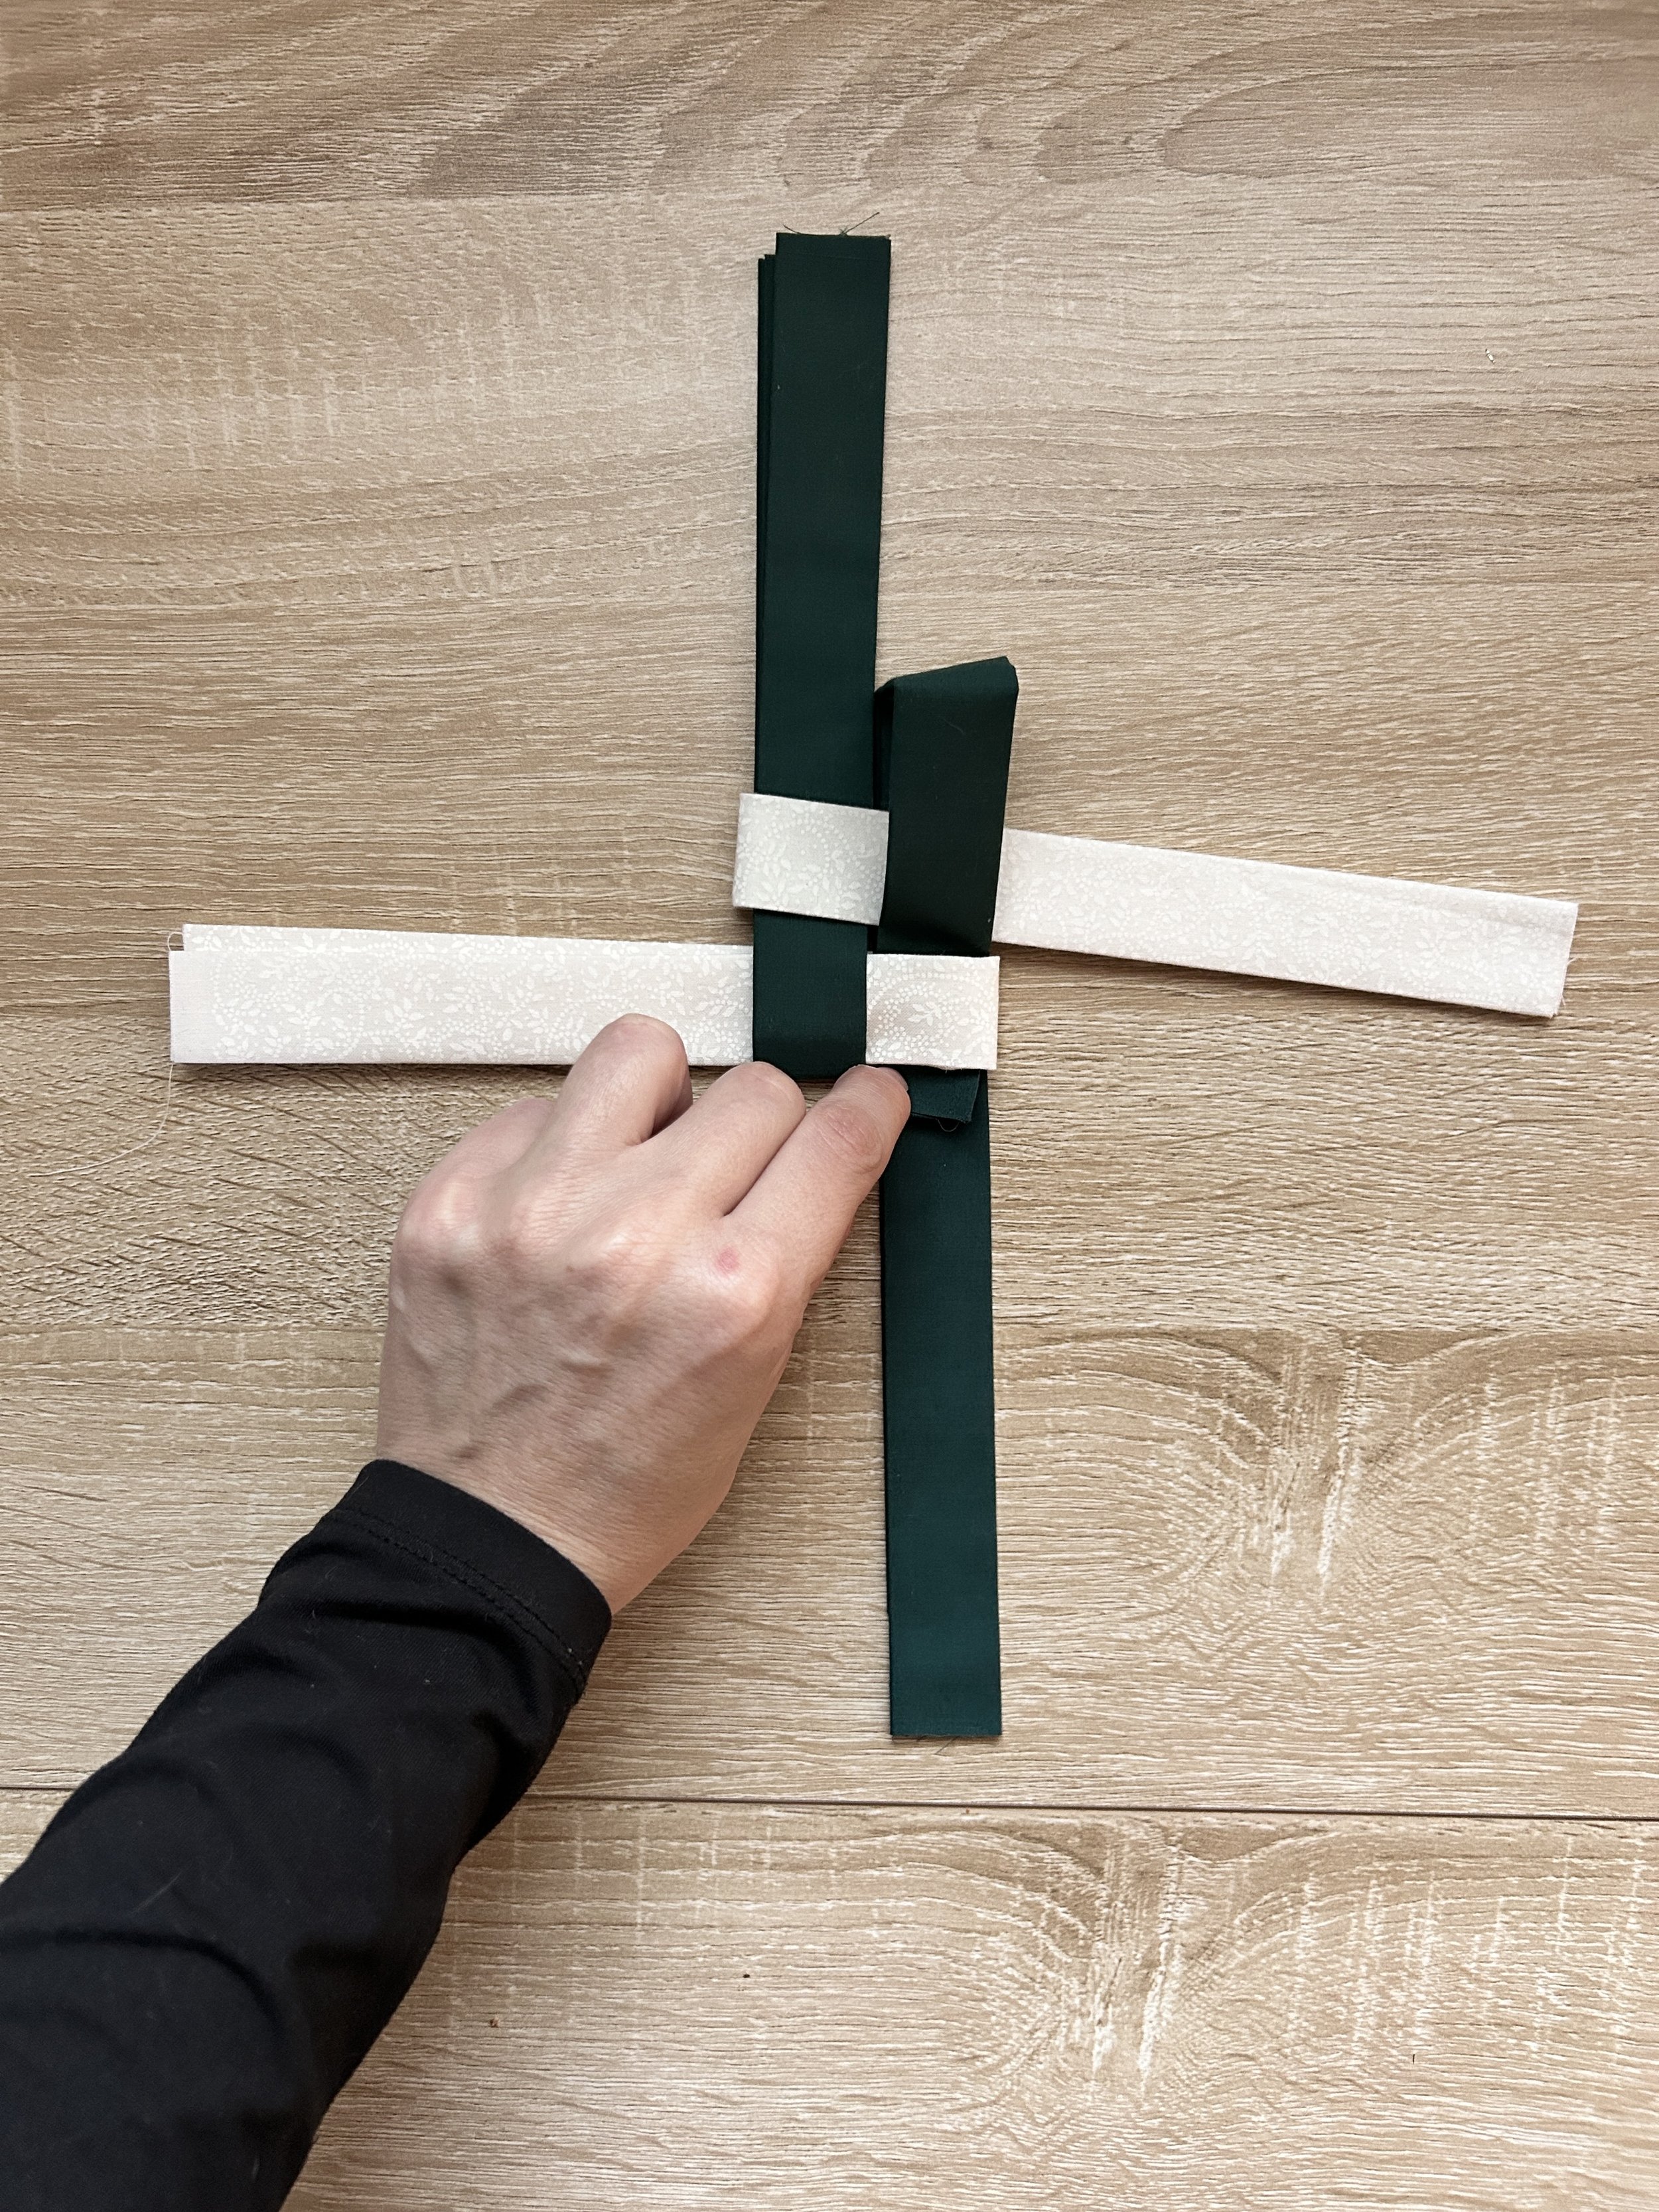
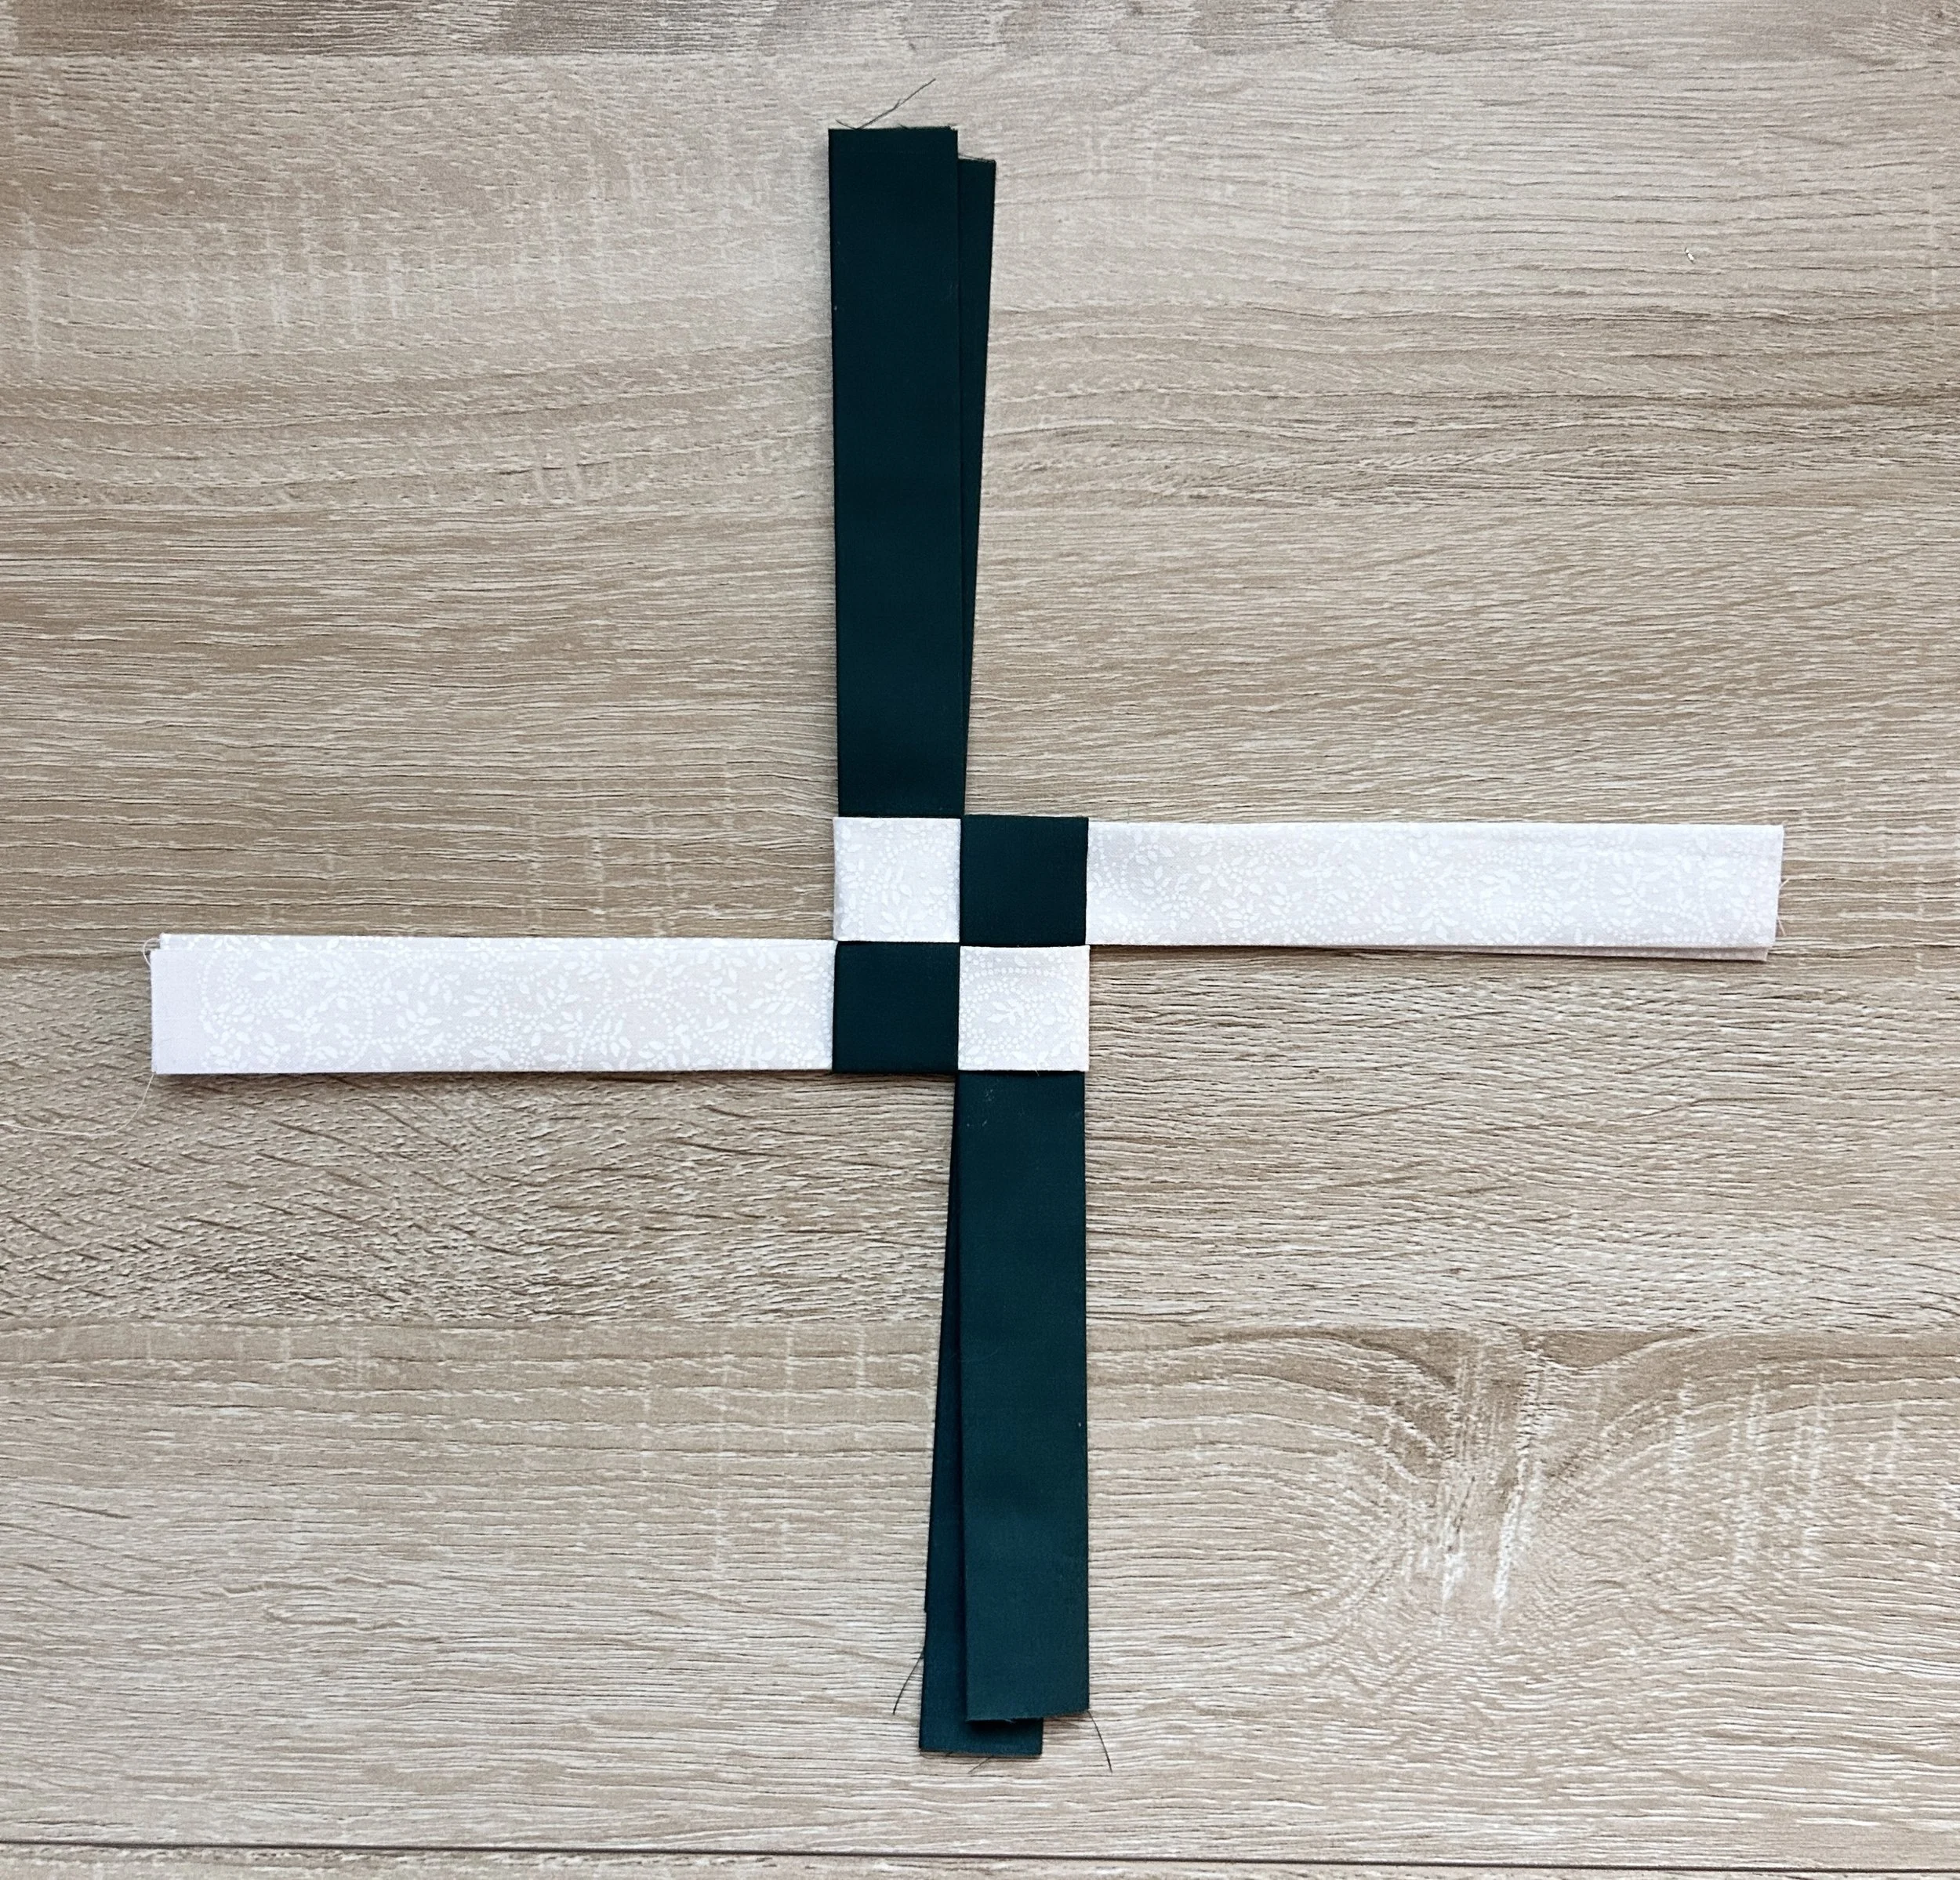
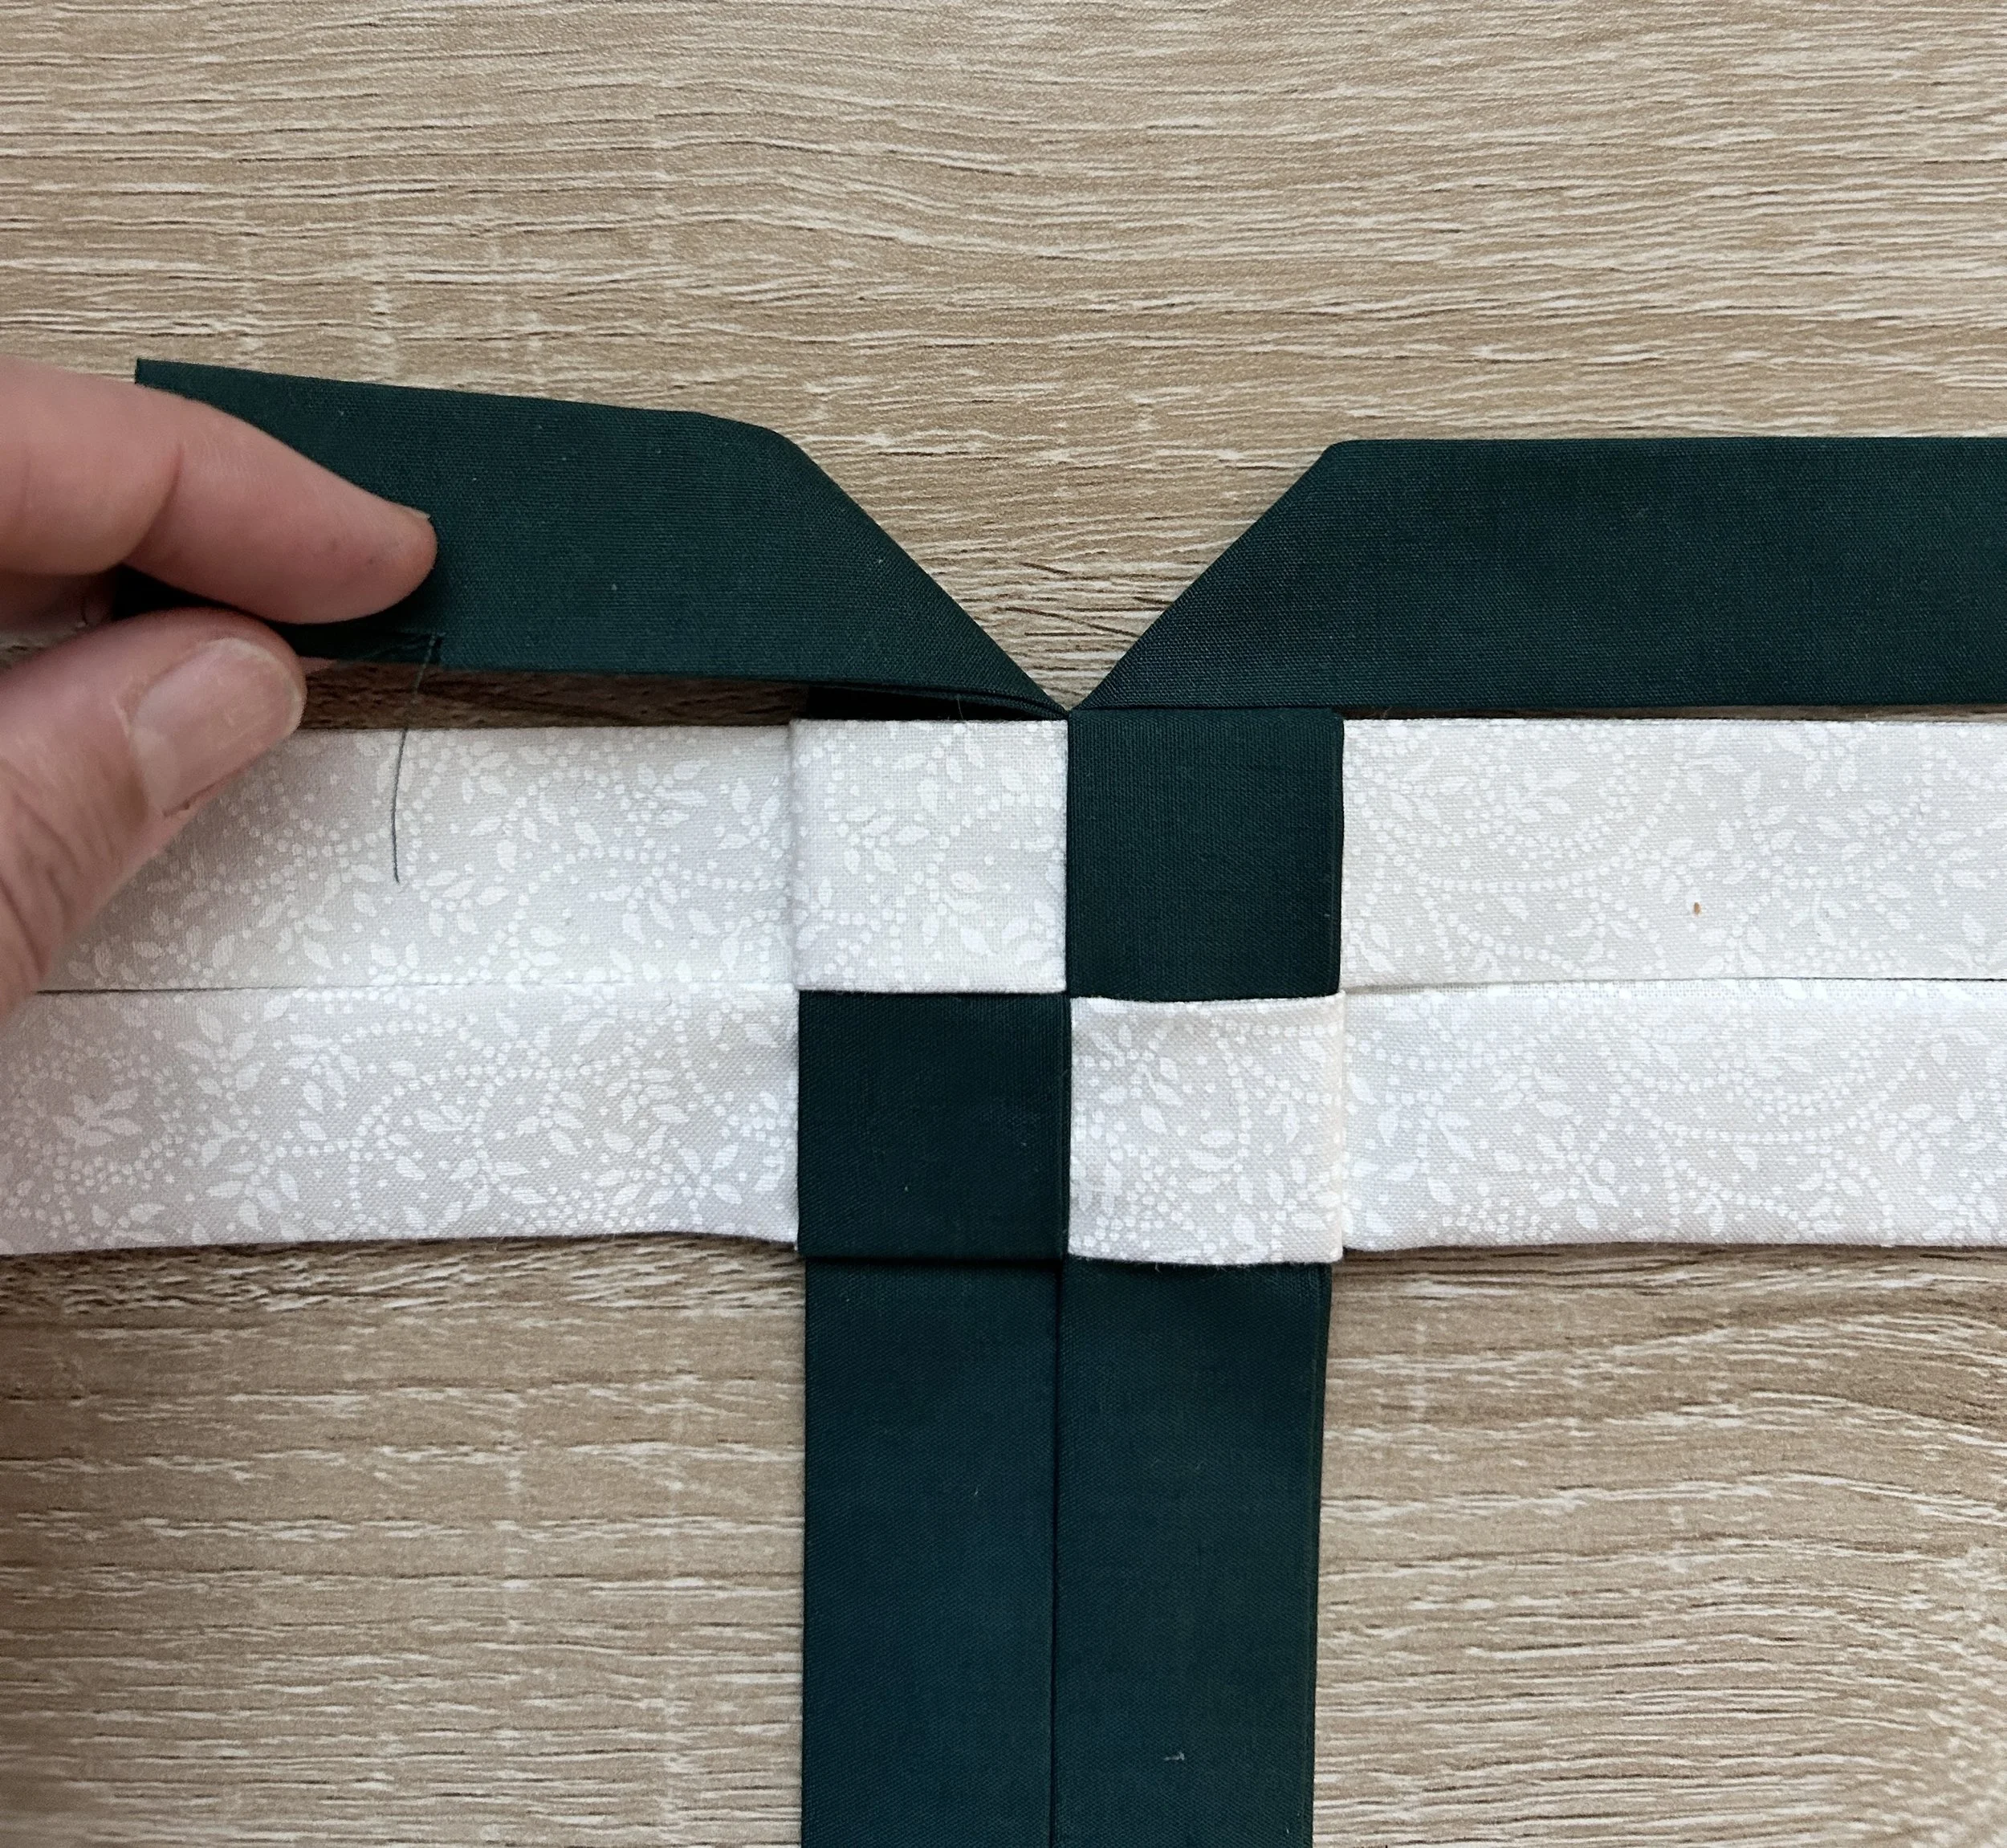
Once they are all pressed, arrange them exactly as shown in the photo. Weaving the strips between one another.
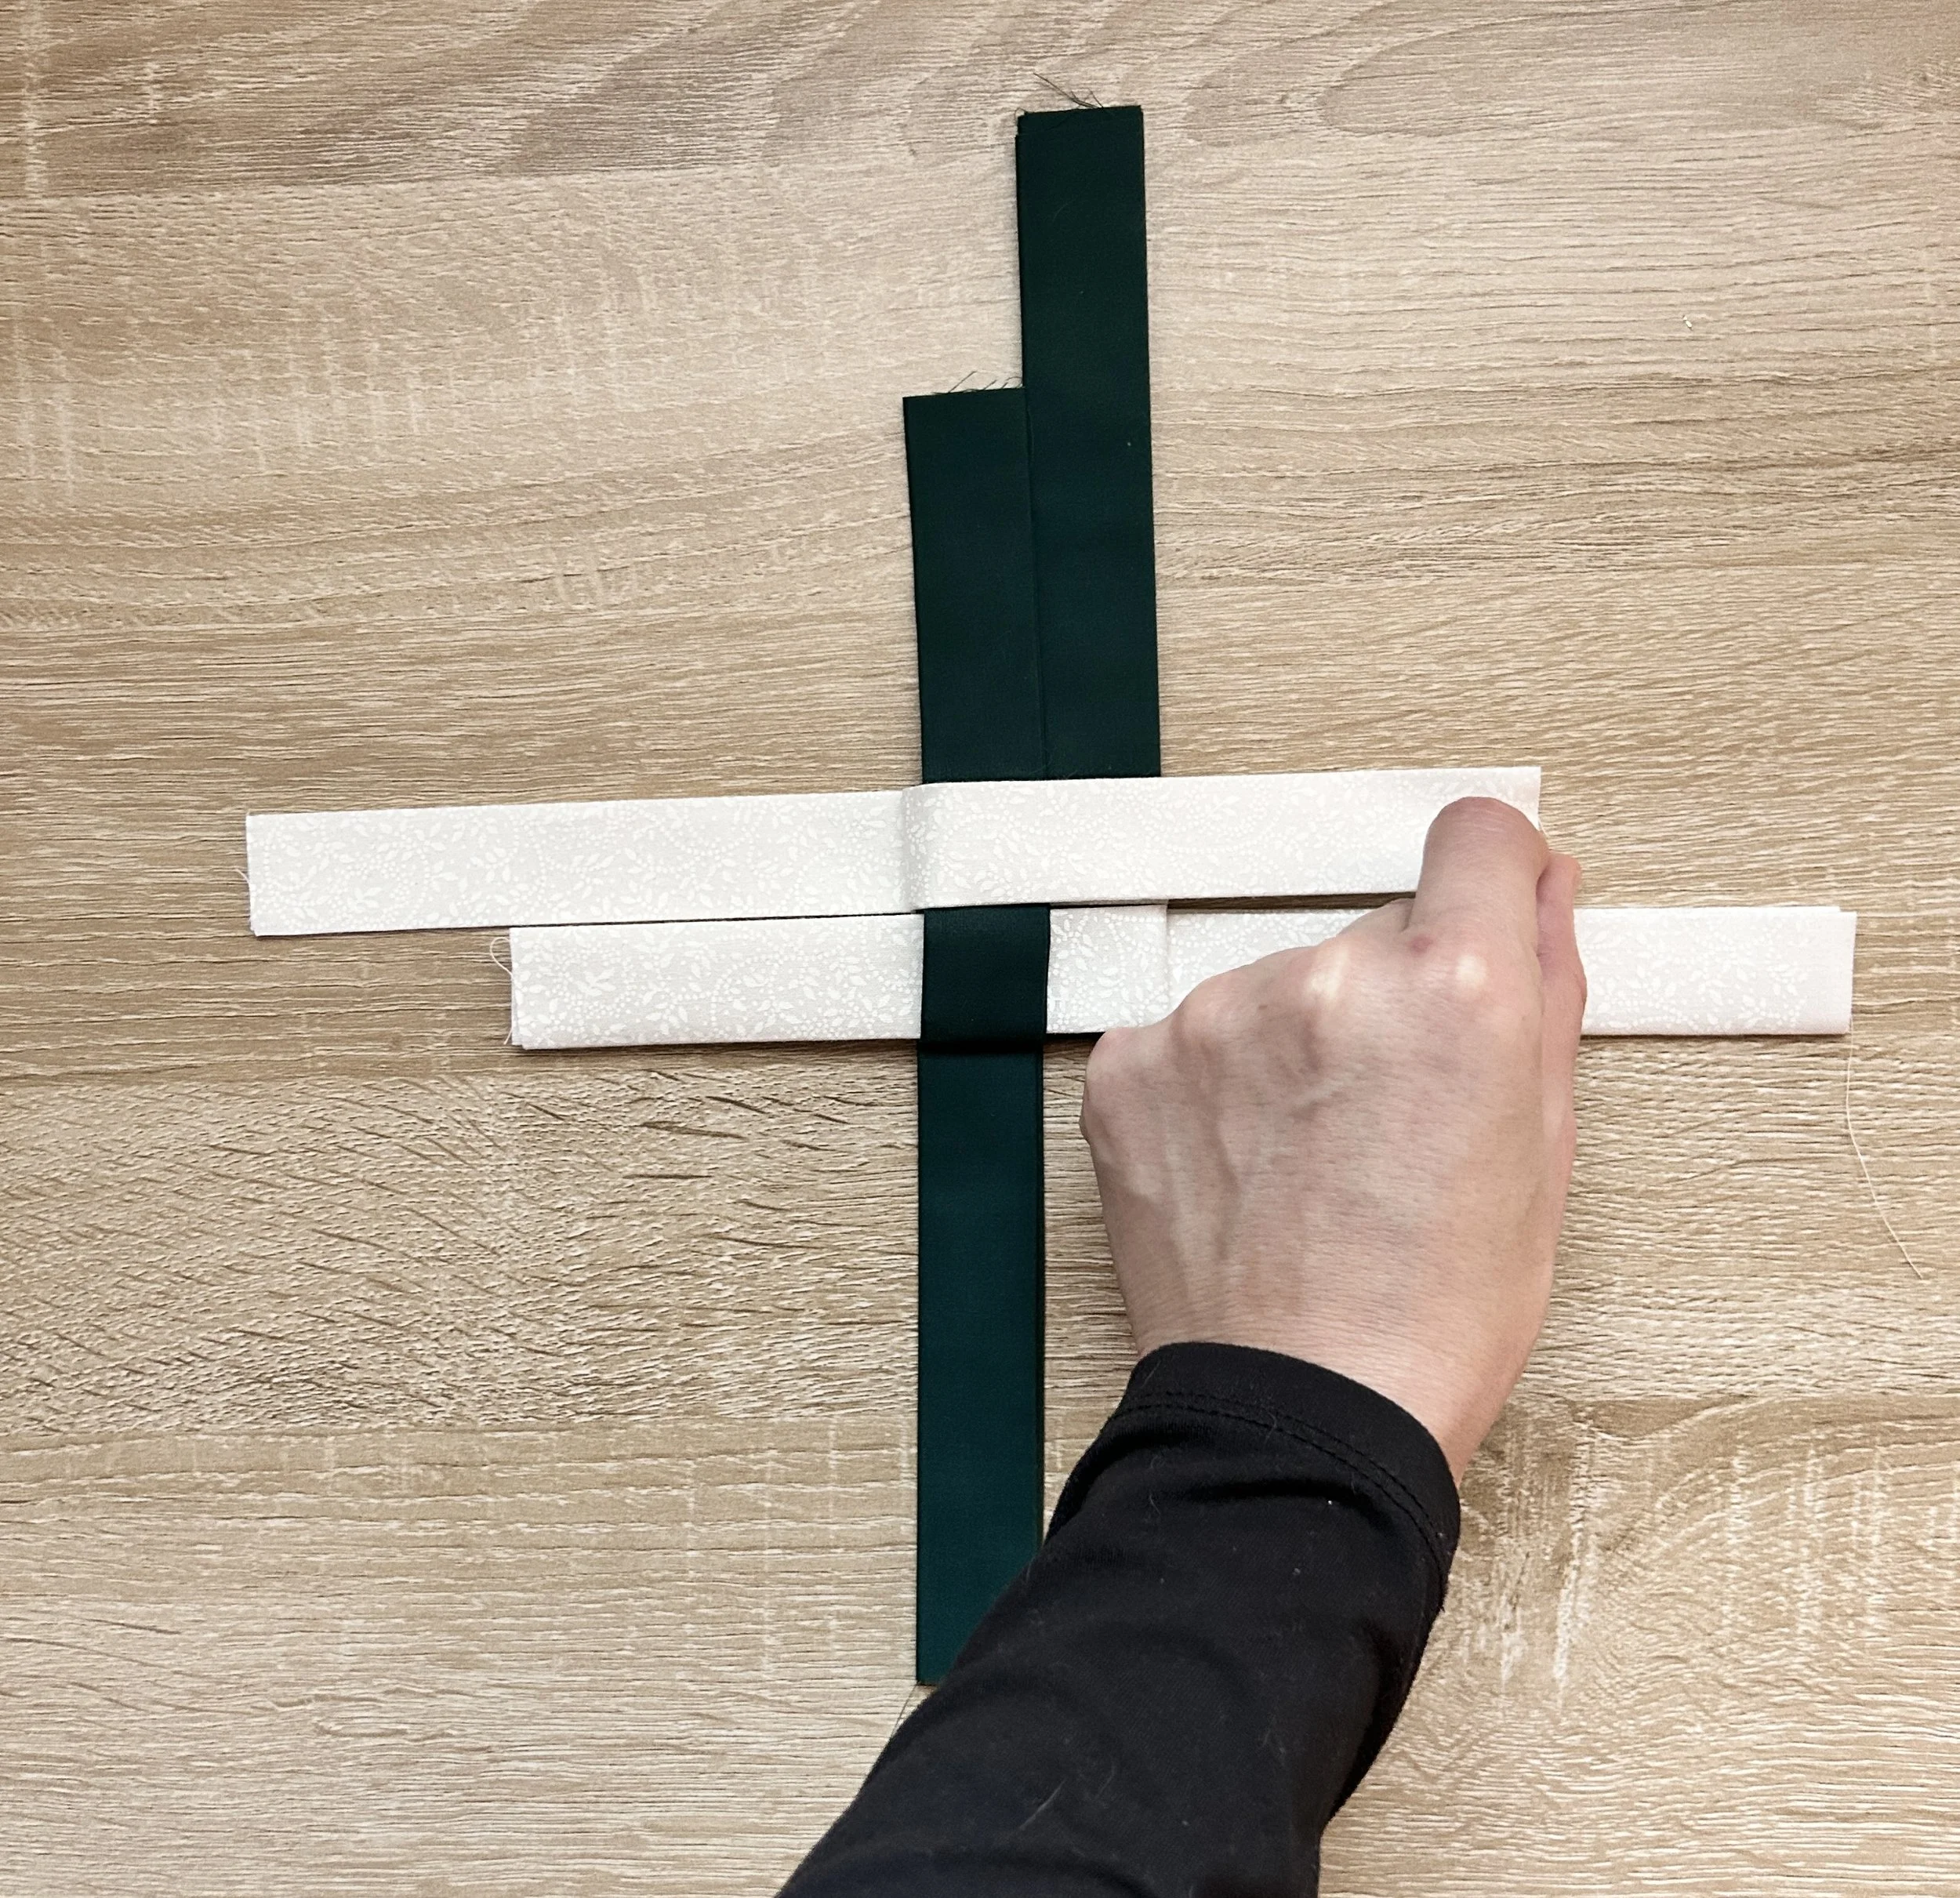
4.
Now you will fold the strips of fabric as shown below. The last strip will be threaded through the square. Once done, adjust strips so that the ends of each strip match up in length and that the square is taught and there are no folds in the fabric.

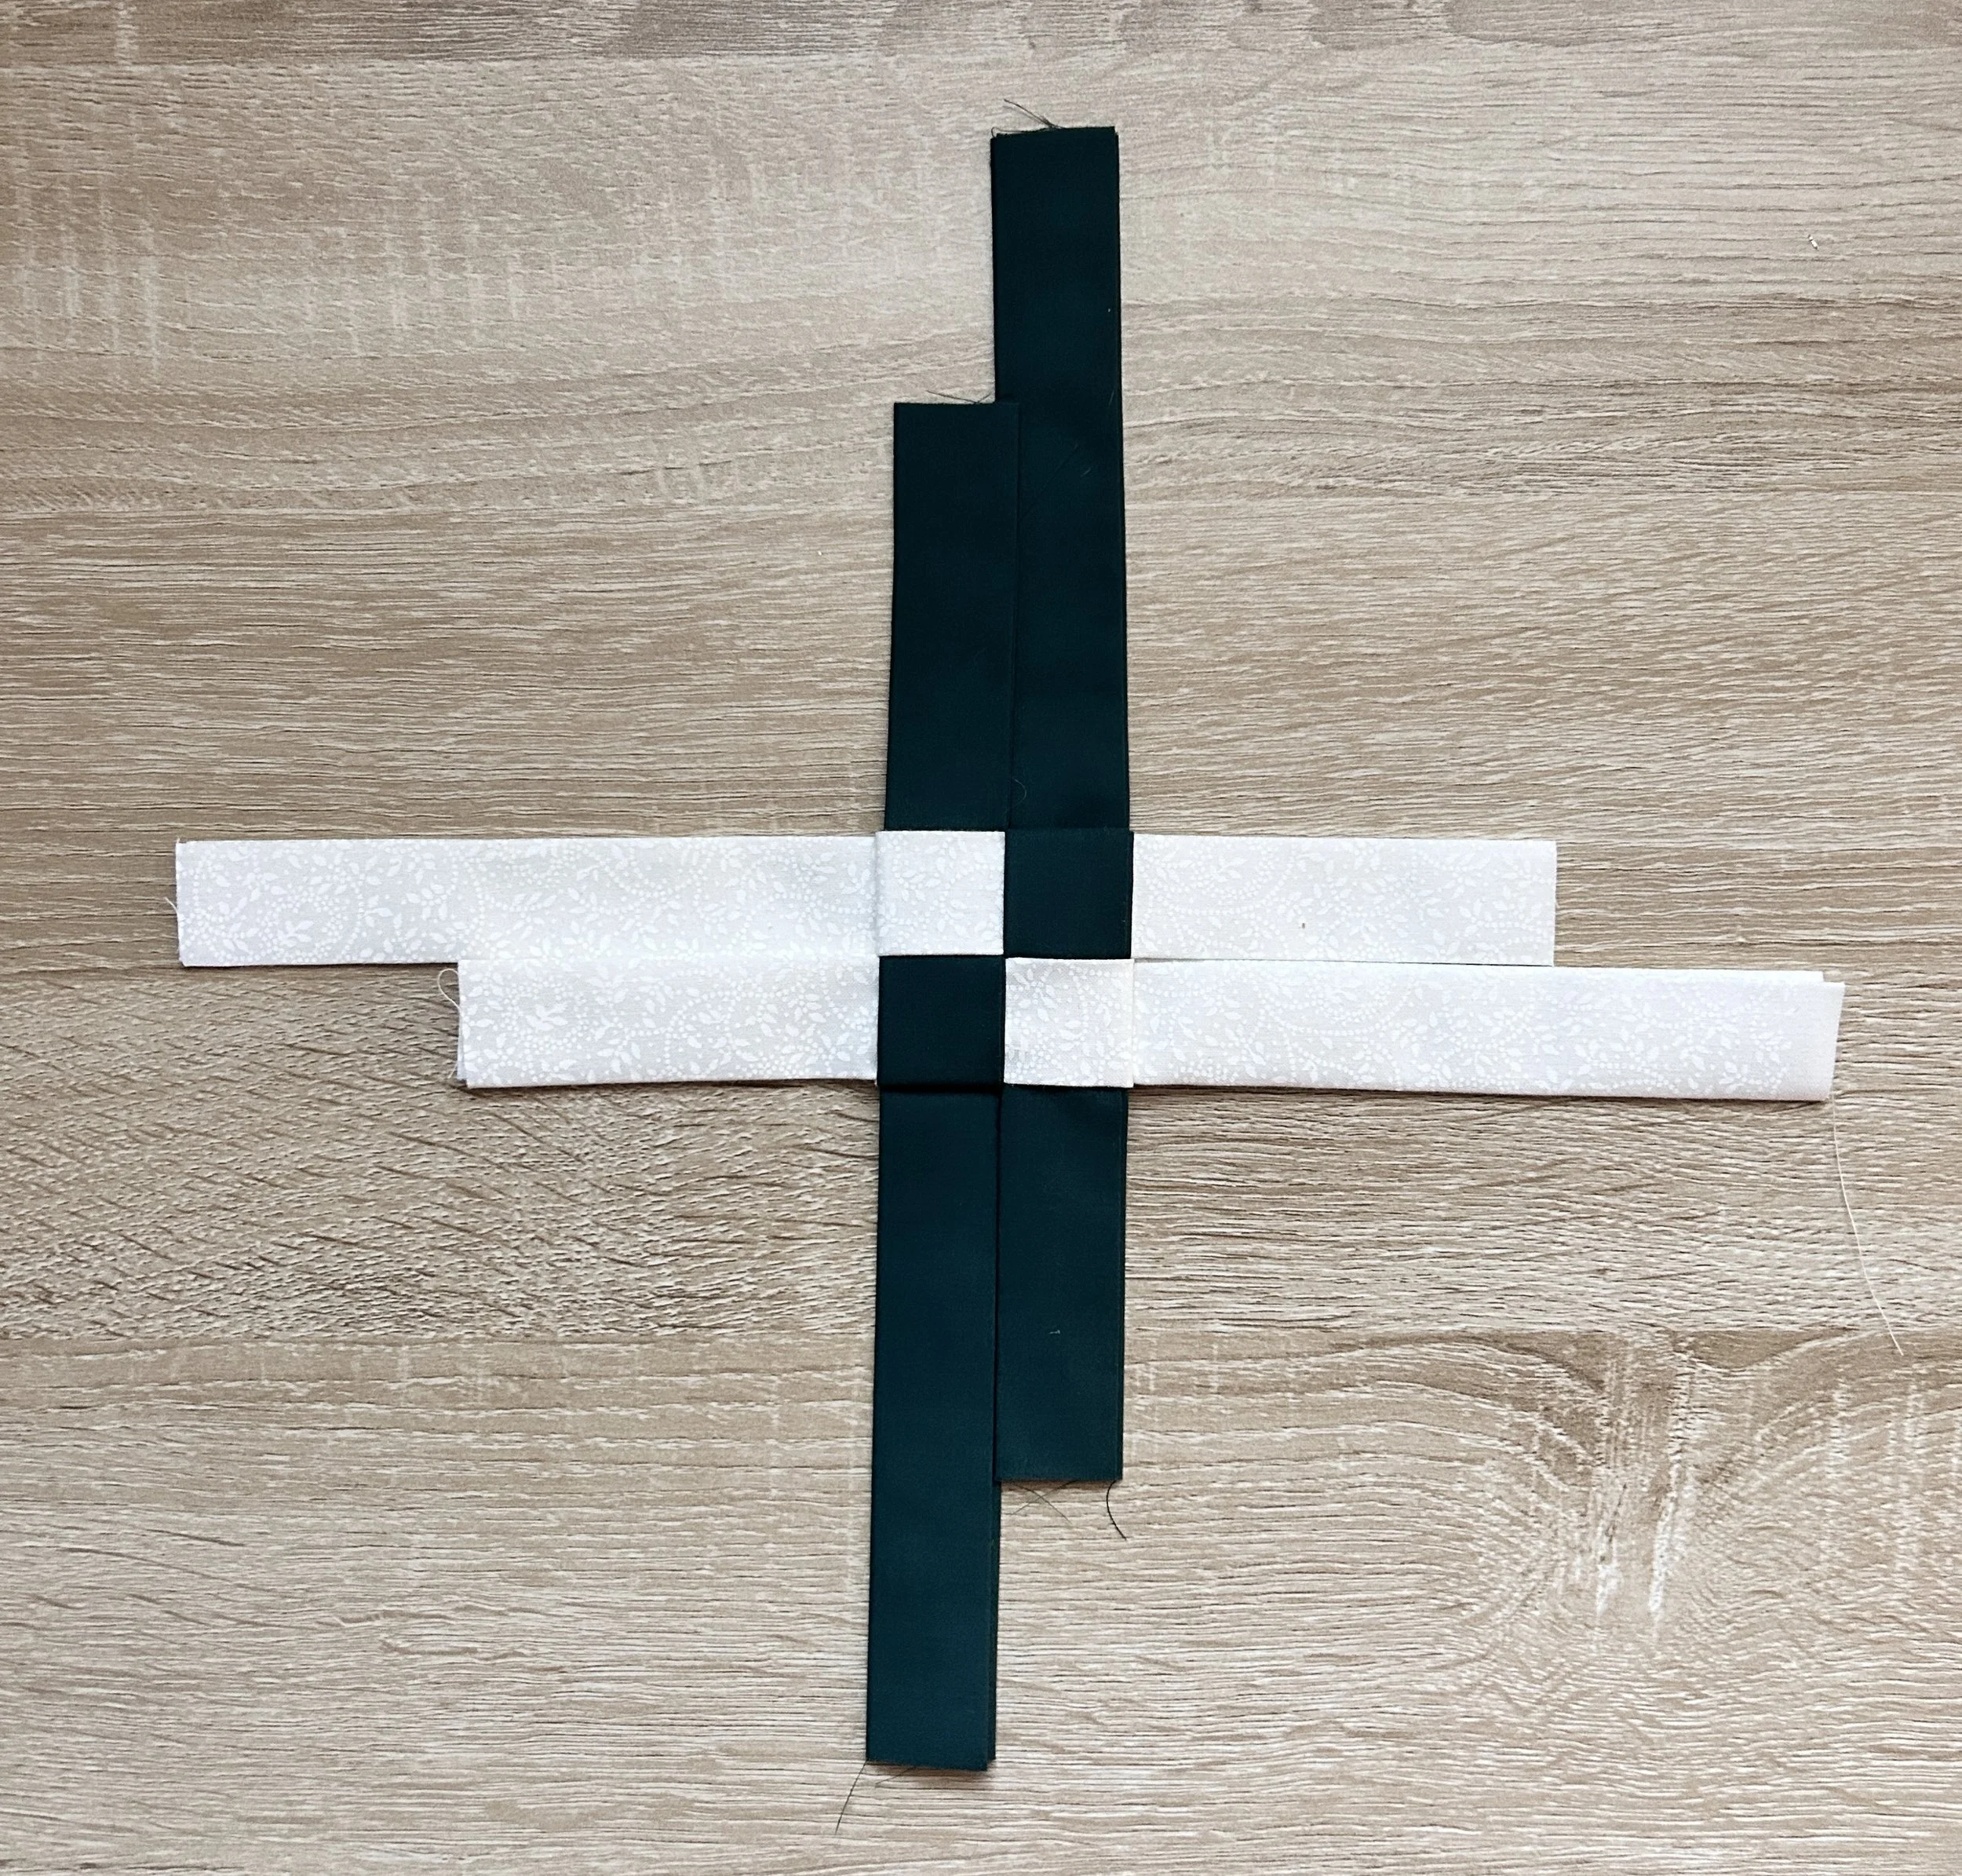
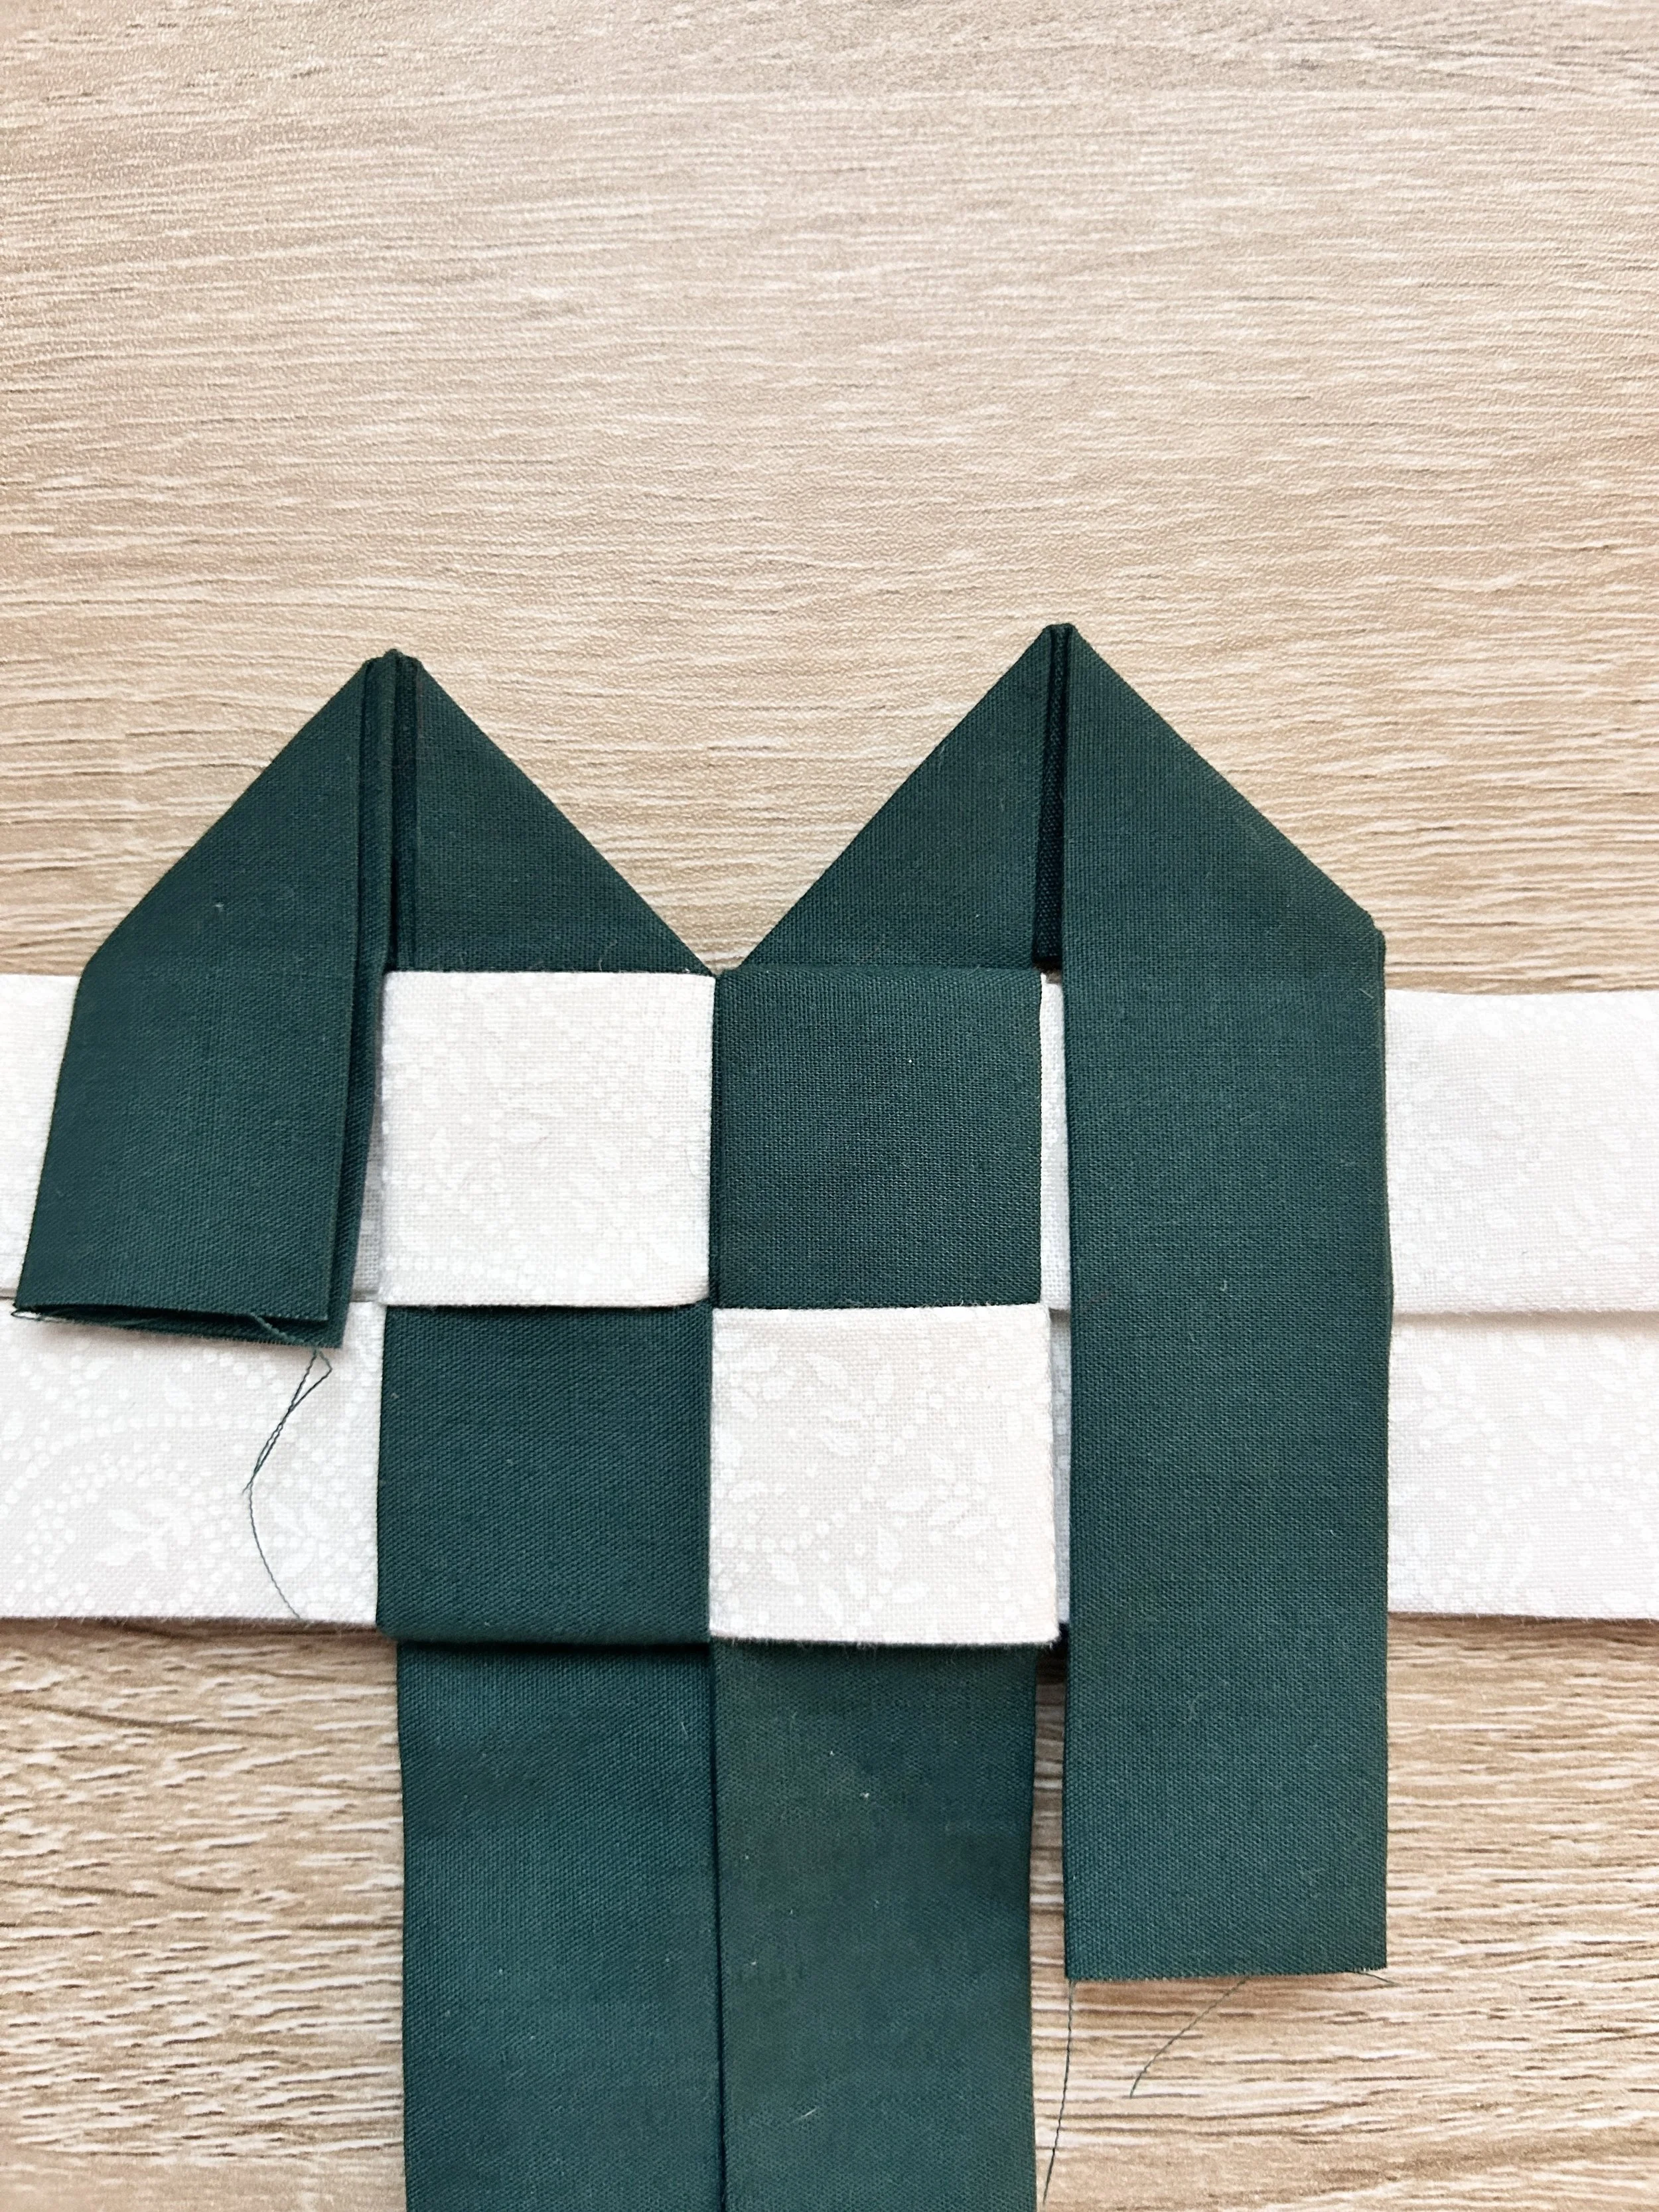
This is what it should look like after folding over the strips of fabric and threading them through. There should be no folds, and the fabric should be pulled tight.
5. Now repeat step 4 all over!

This is what it should look like once step 5 is complete.
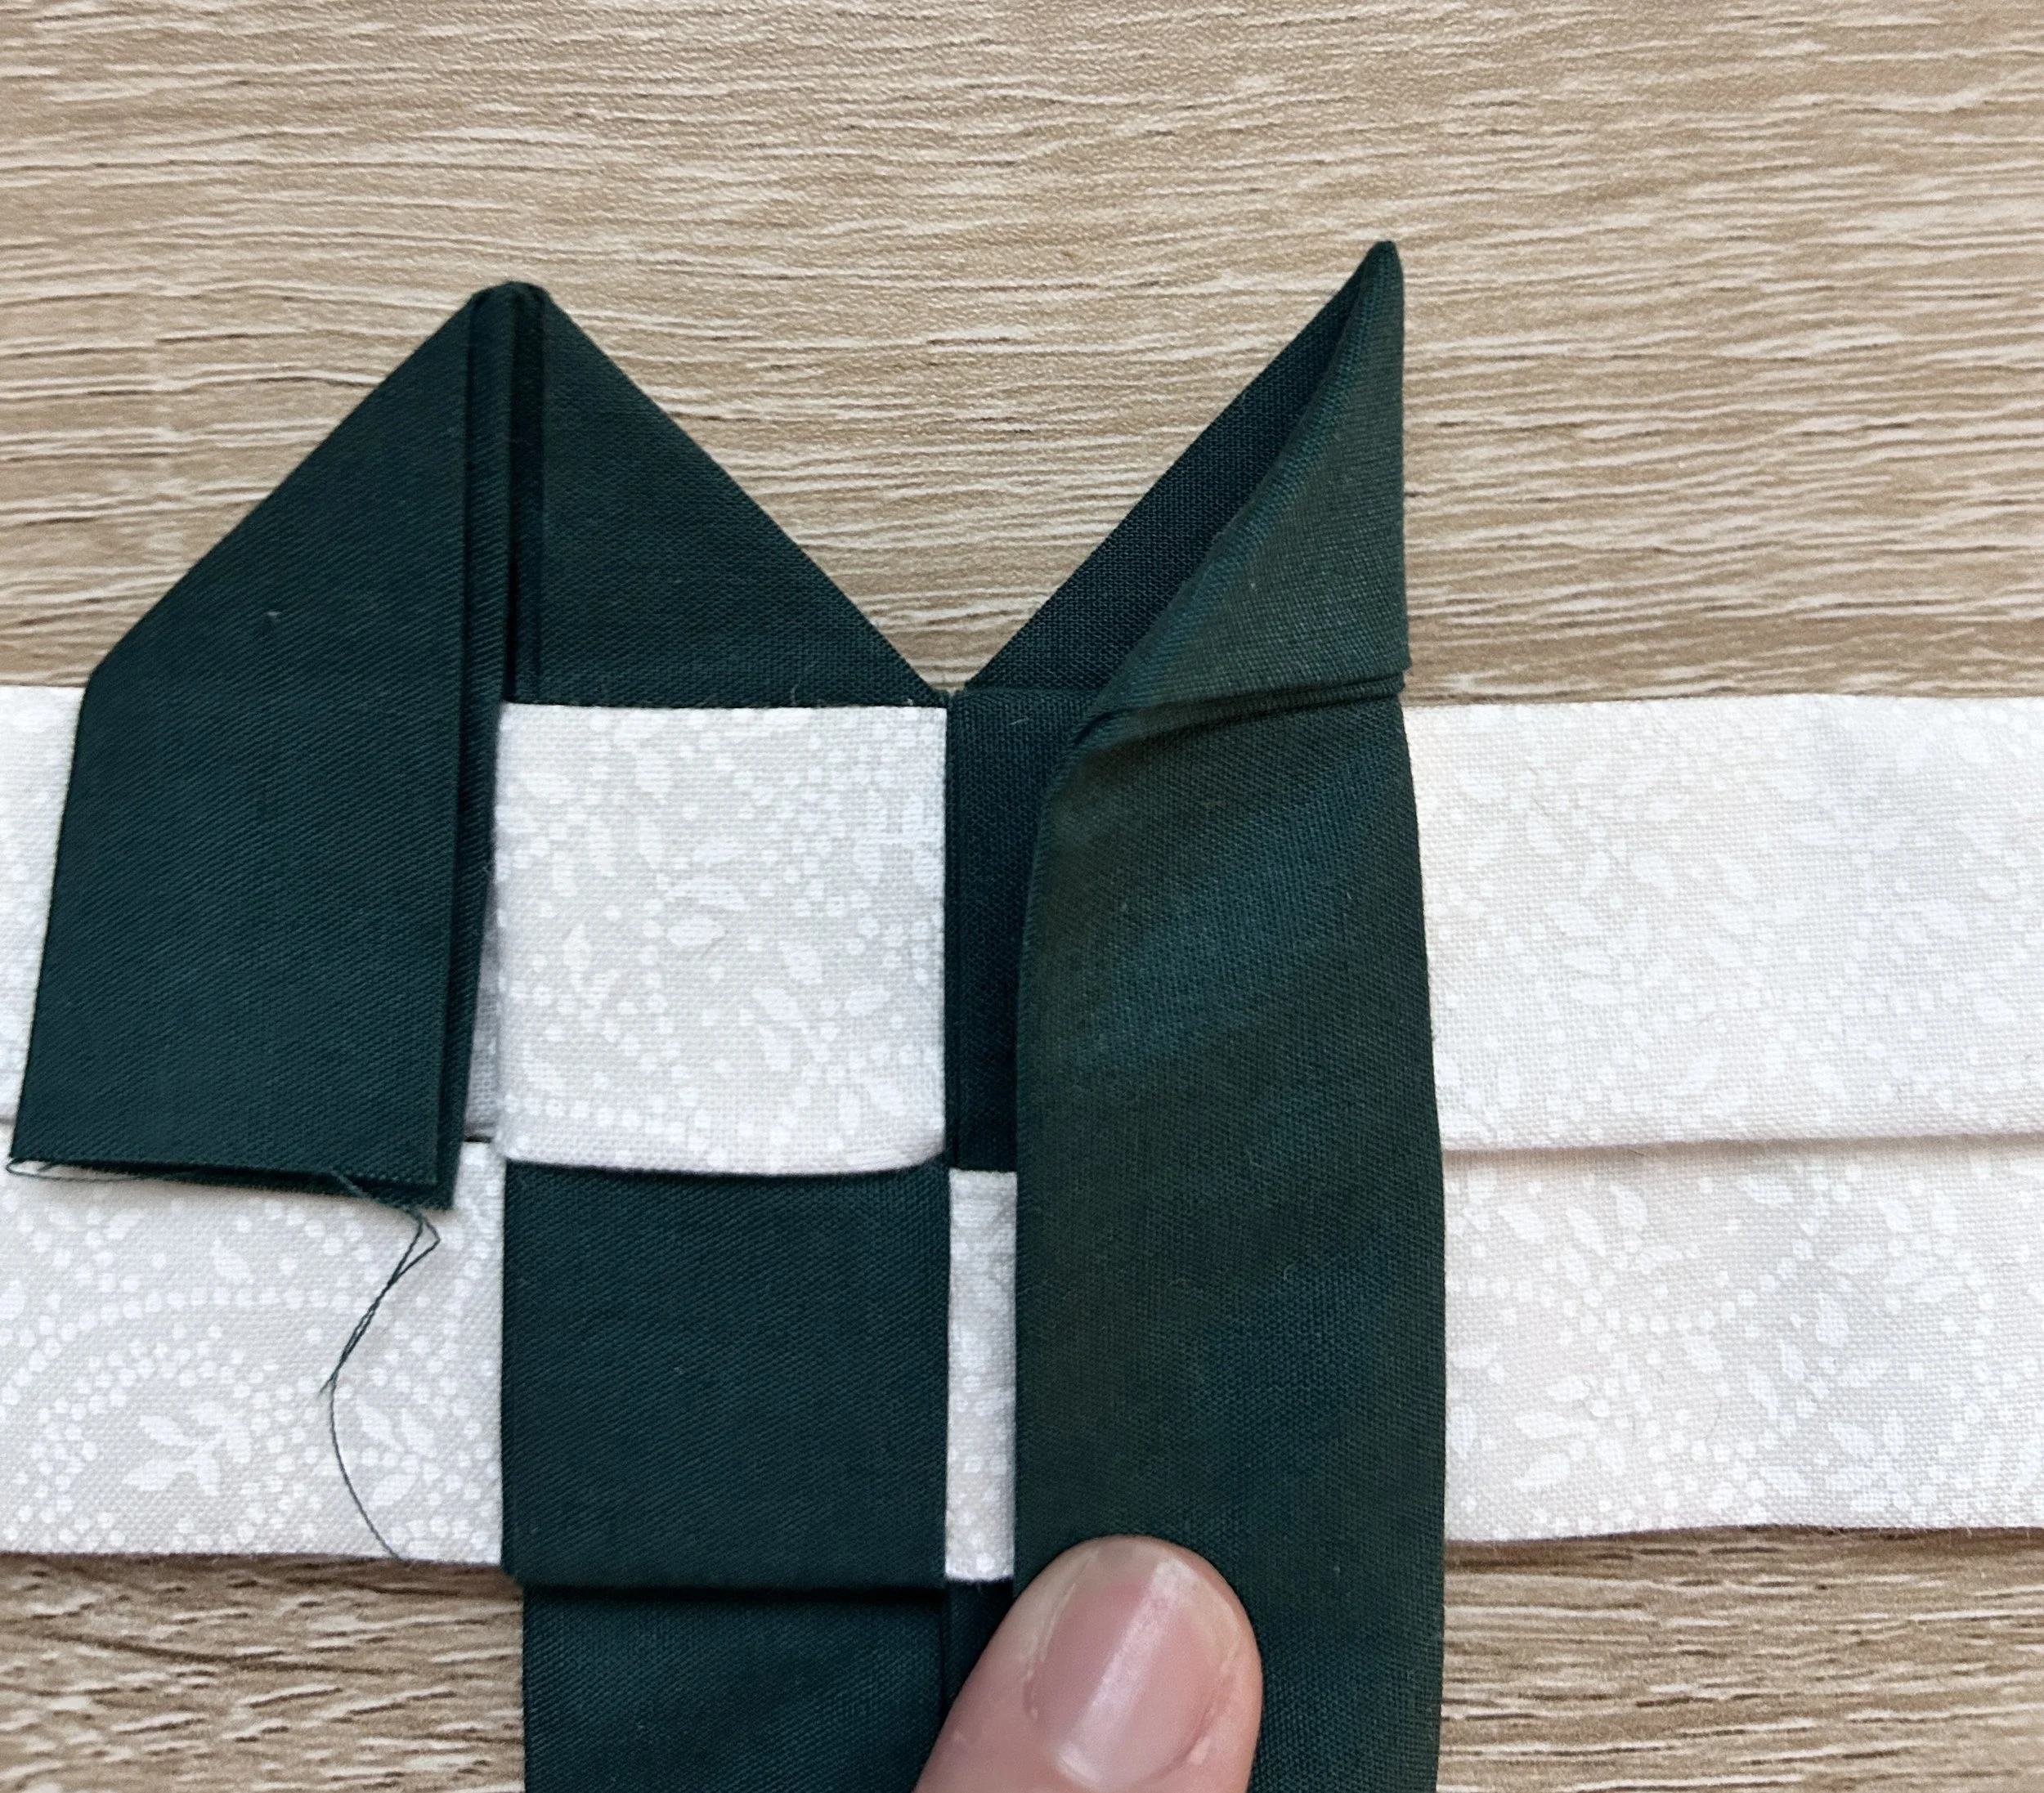
6.
Now fold back the strips so that this point forms in between. Take your time with this step and press each fold well!
7.
Flip the star over and fold the fabric strip down. Press. TIP: I leave the slightest gap at the tip of the triangle. I find it makes for a crisp point in the next step…
8.
Now fold each point over to form the star point. Press and trim the excess down. Don't trim too short. Leave enough to tuck behind the square.
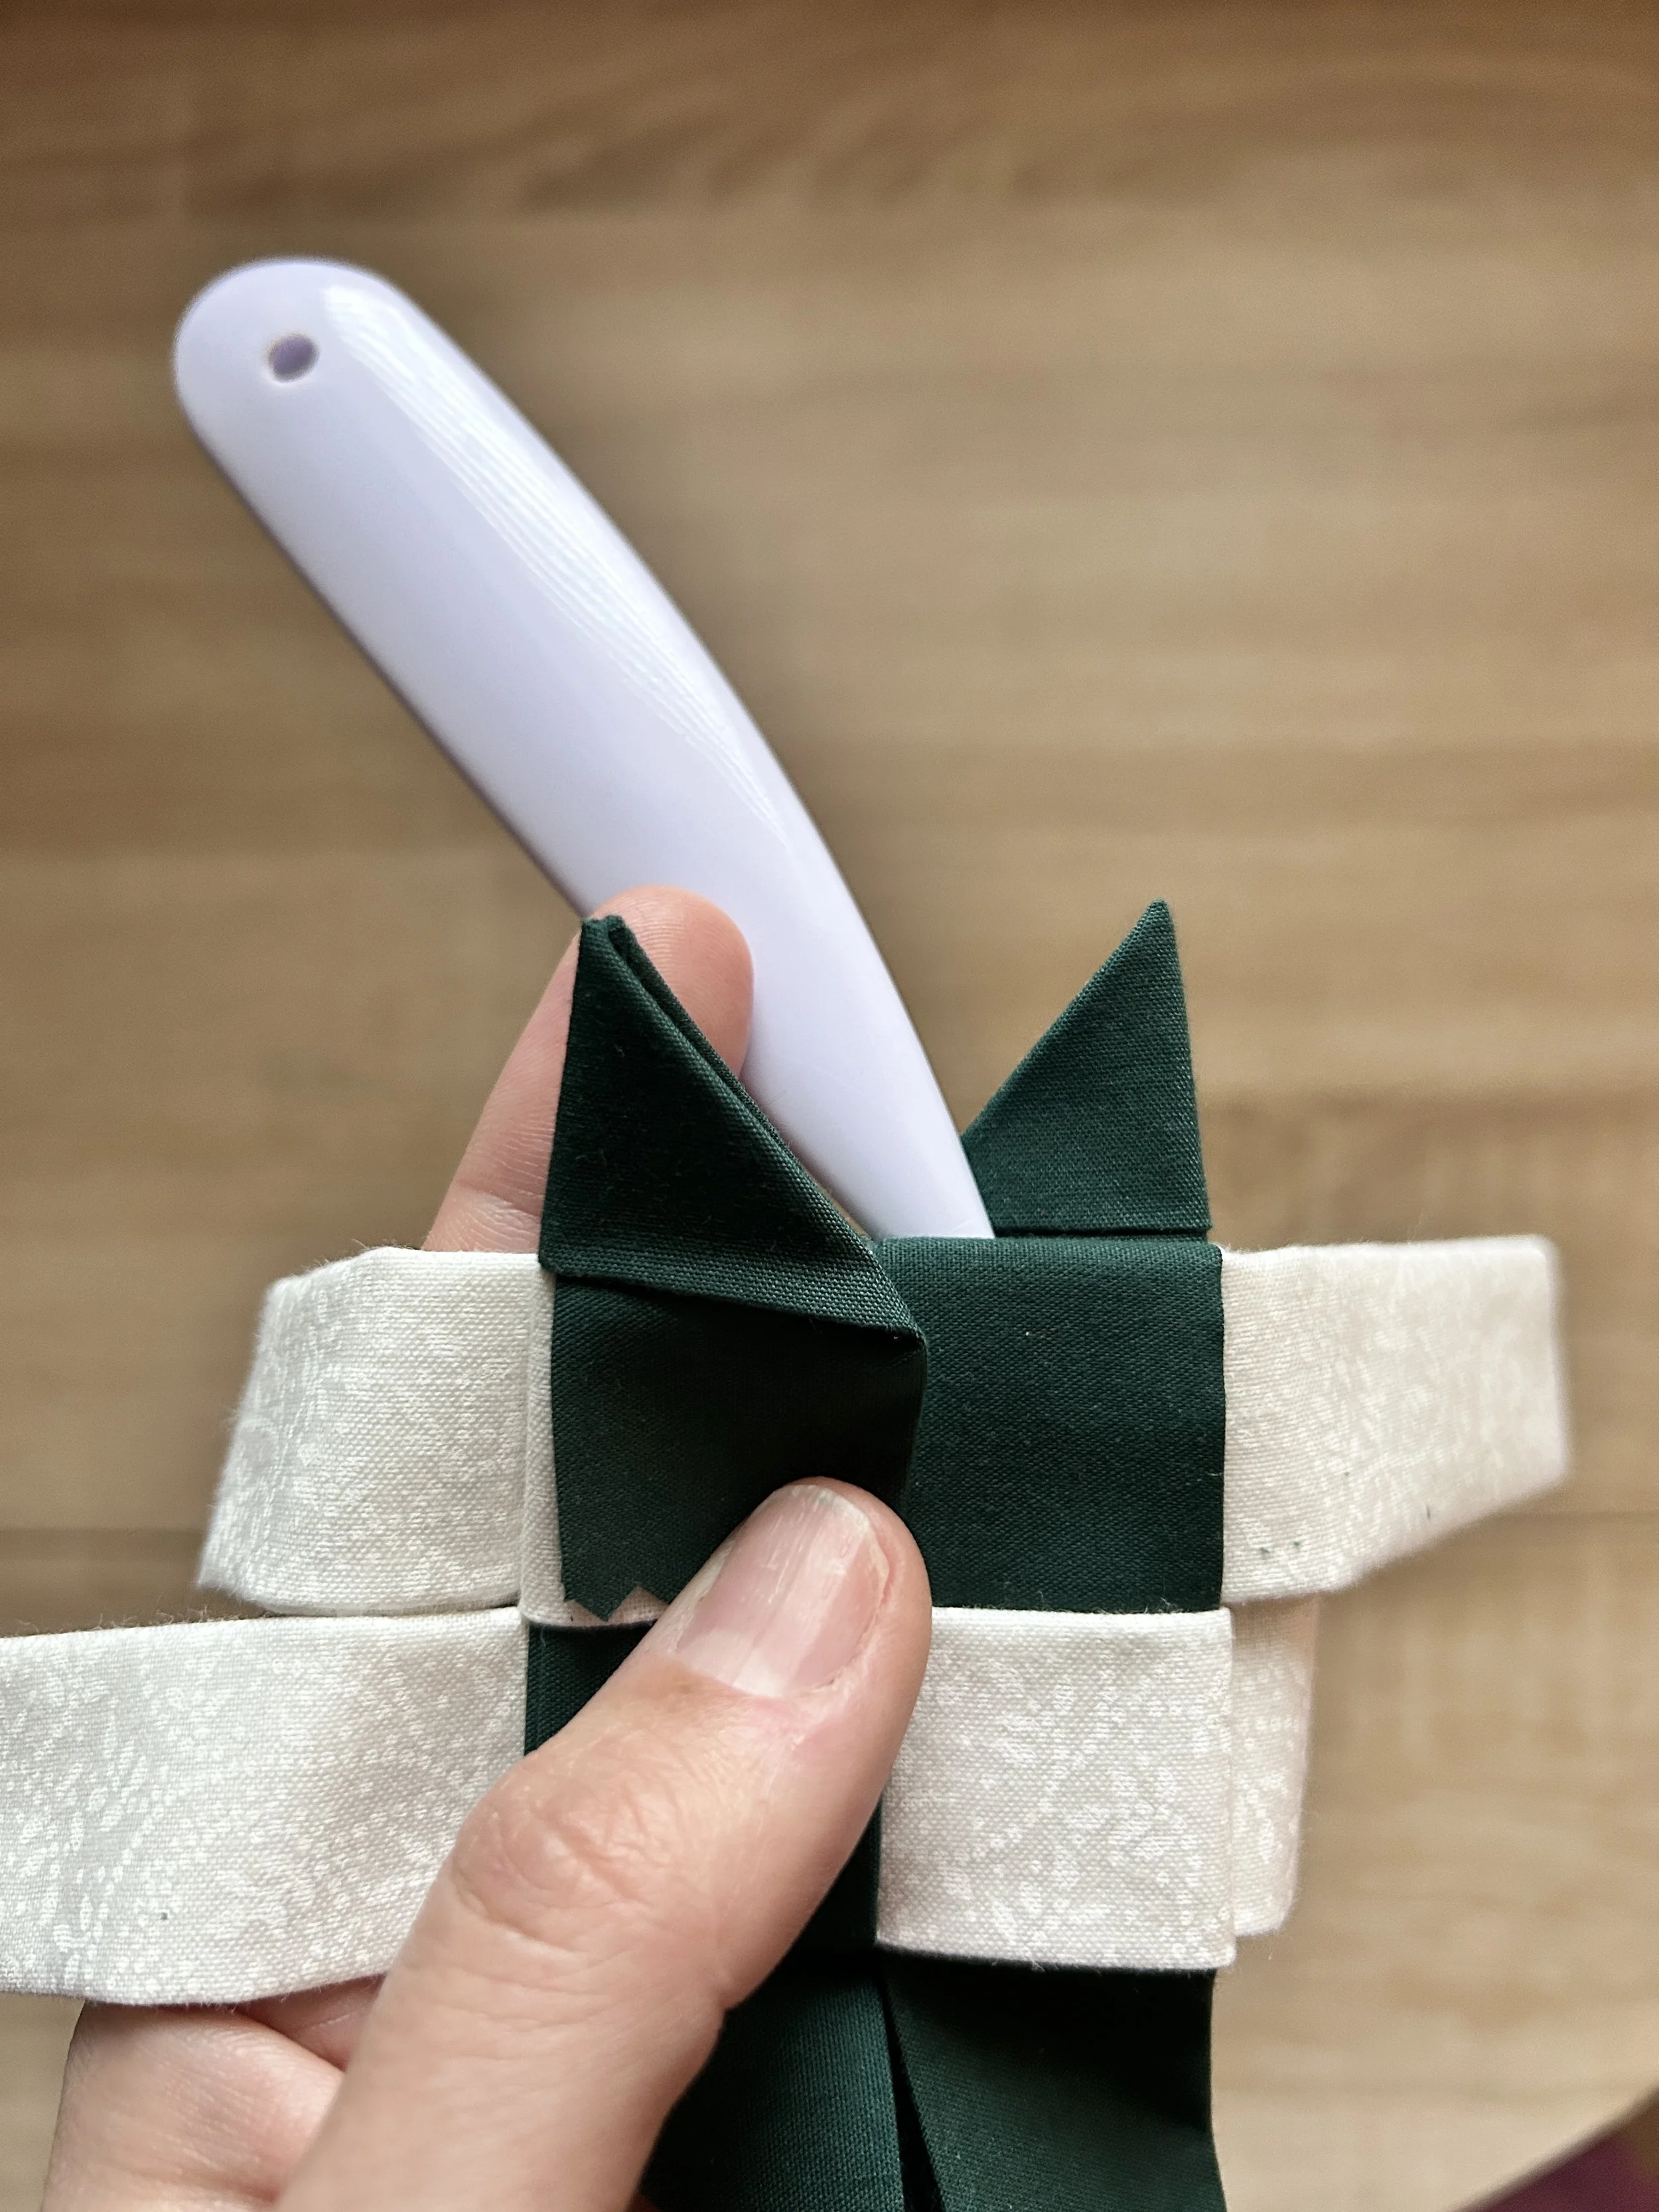
9.
Tuck the tail of the Point behind the corresponding square. Take your time and adjust so that it lies flat.
I like to use a pint turner for this to help tuck the fabric.
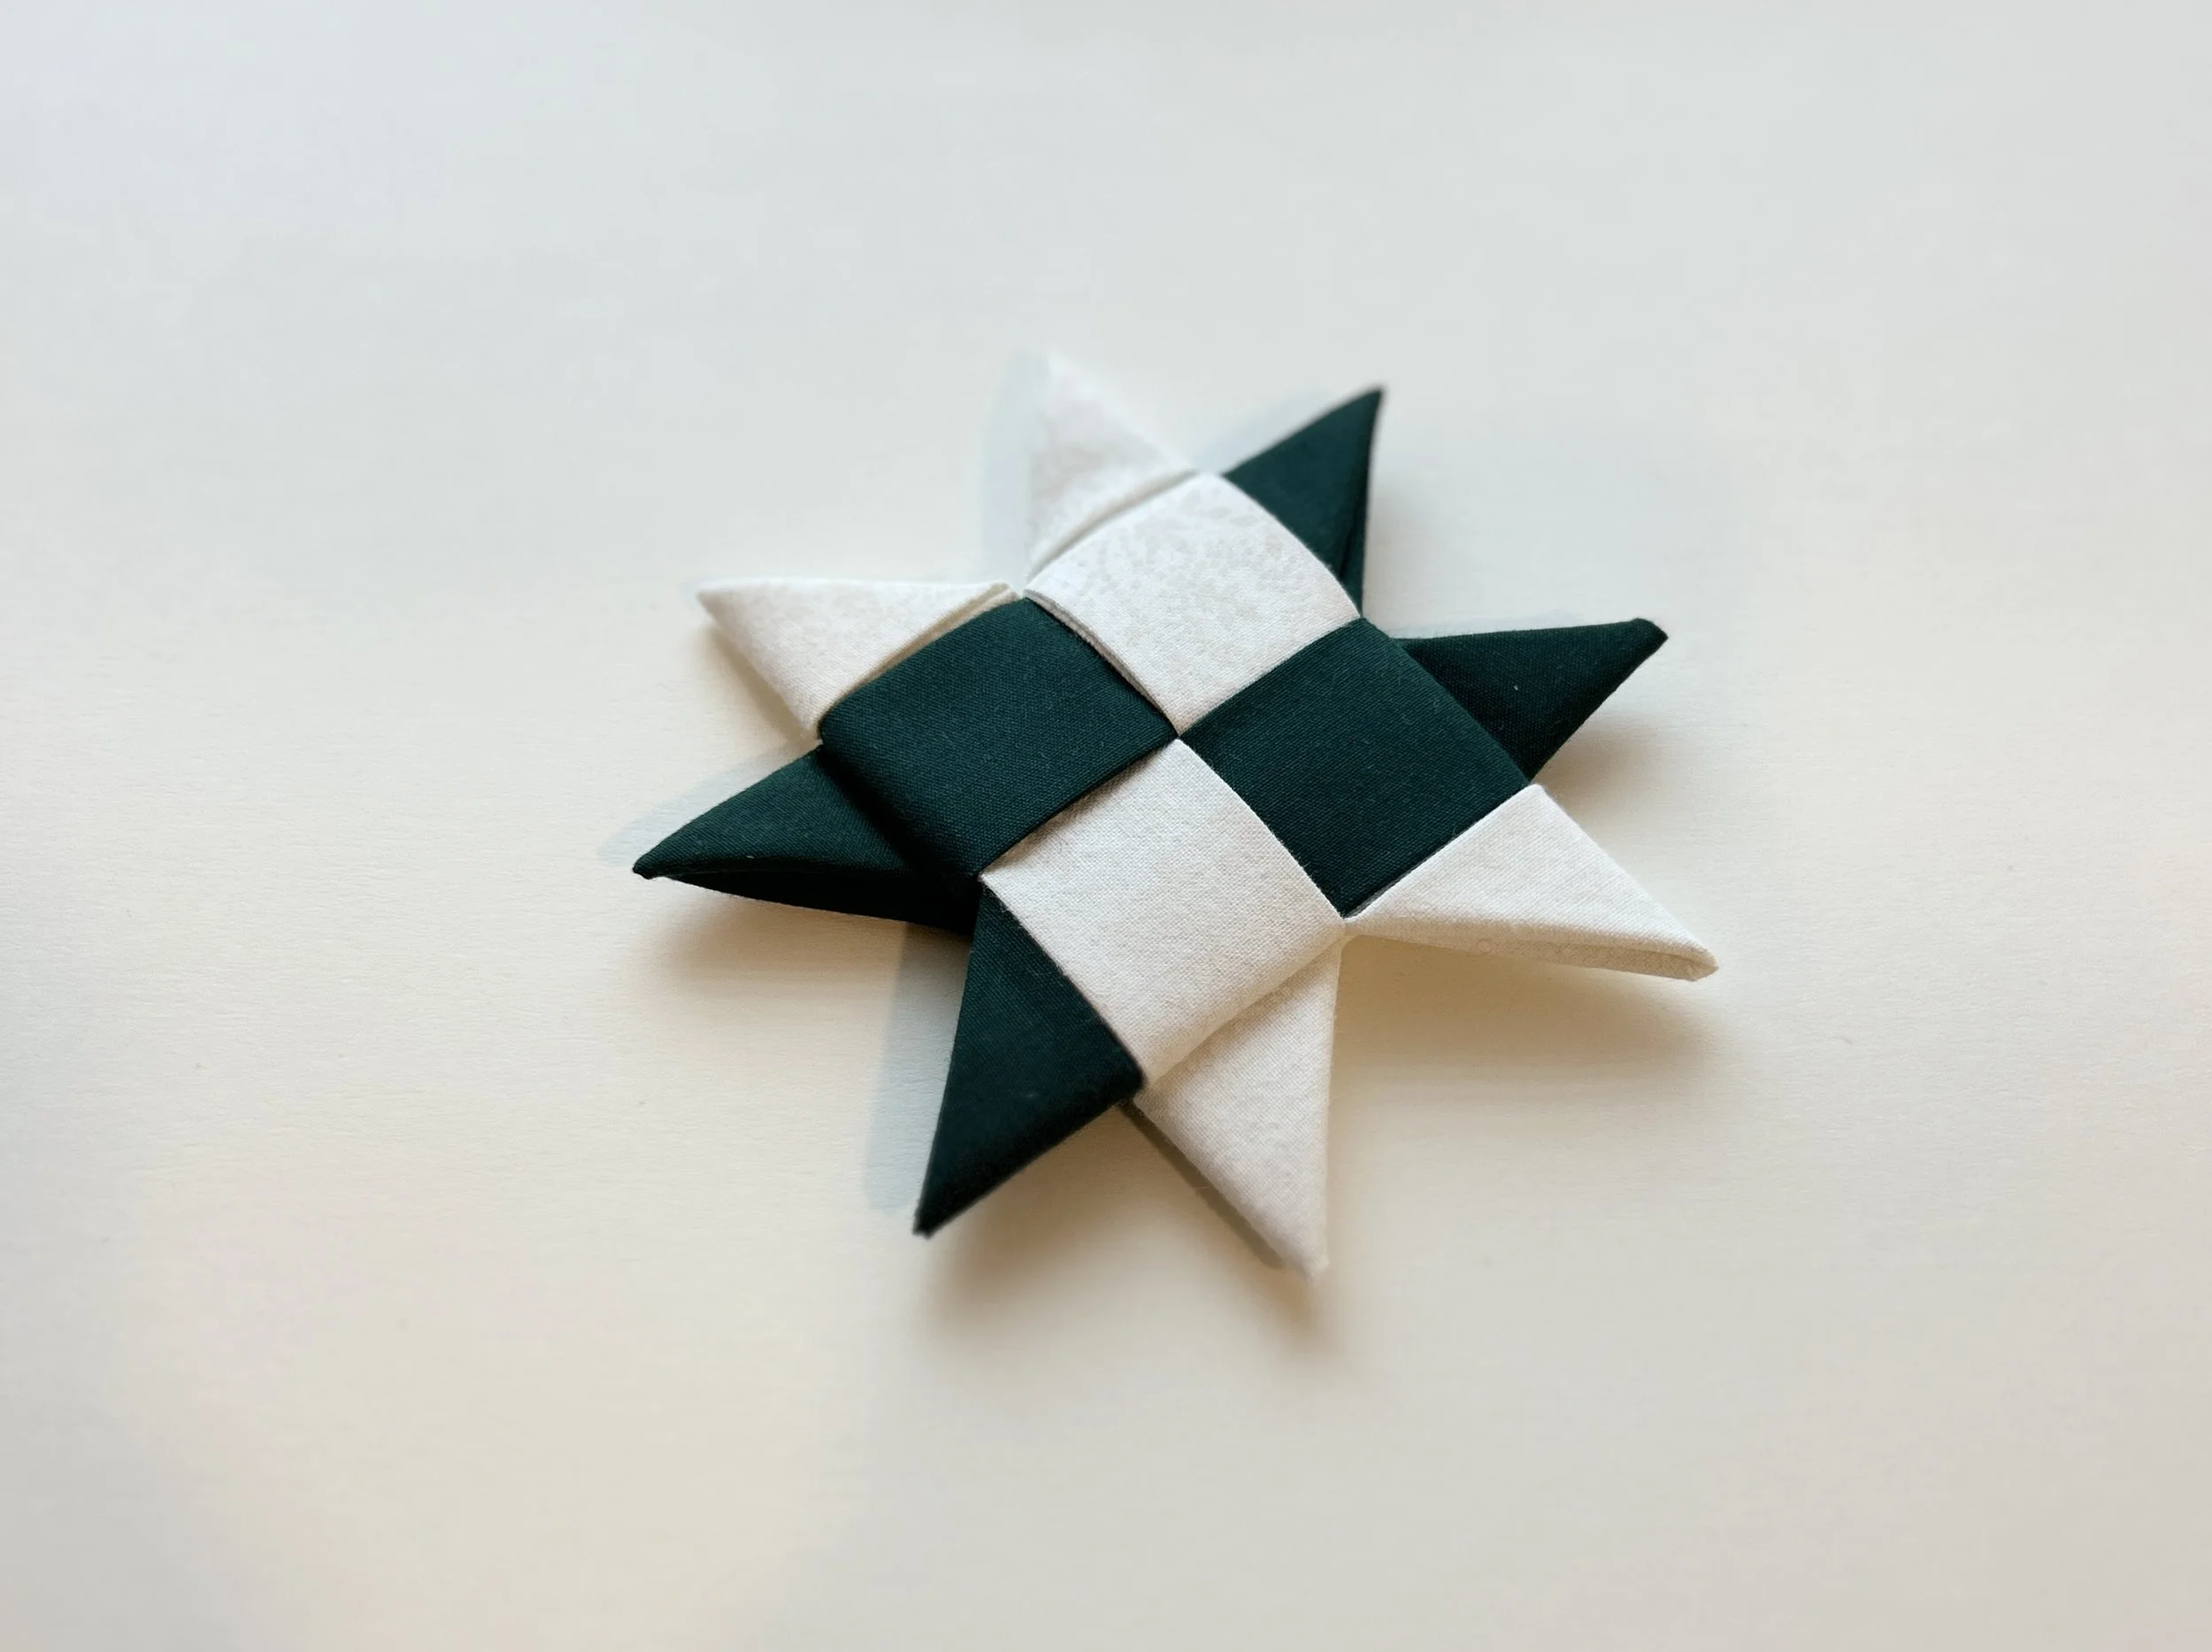
Enjoy your beautiful star or gift someone a beautiful handmade treasure!